

This blog will guide you through the “Interact with Shares” section of the Nutanix Files Test Drive. Nutanix Files is a software-defined, scale-out file storage solution that provides a repository for unstructured data, such as home directories, user profiles, departmental shares, application logs, backups, and archives. If you’re finding this post through the Nutanix .Next community and haven’t tried Test Drive for Files yet, we highly recommend that you check it out.
The Interact with Shares walk-thru will provide you connection details to a Windows client you can use to access the existing Nutanix Files instance.
To get the name of the installed Nutanix Files instance go to the AOSonGCP Prism Element File Server page. To get to Prism Element from Prism Central, click on AOSonGCP in the Cluster Quick Access widget on the Prism Central dashboard, or click on “Go to Prism Element” from the Quick Links menu.
Once inside Prism Element, navigate to the File Server menu.
Look for the Name in the File Server table on that page.
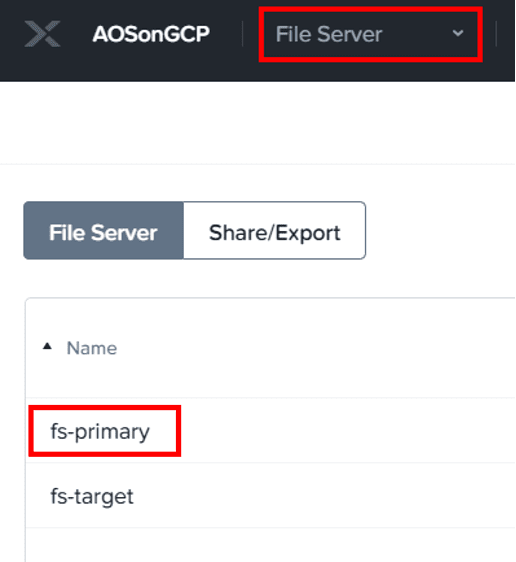
With the latest version of the Files Test Drive there are two file servers, fs-primary and fs-target.
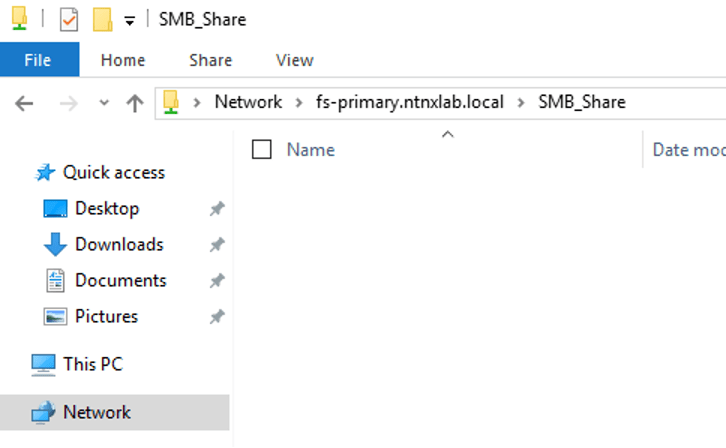
To validate the connection to the file server go to \\fs-primary.ntnxlab.local\SMB_Share from within Windows Explorer of your assigned client.
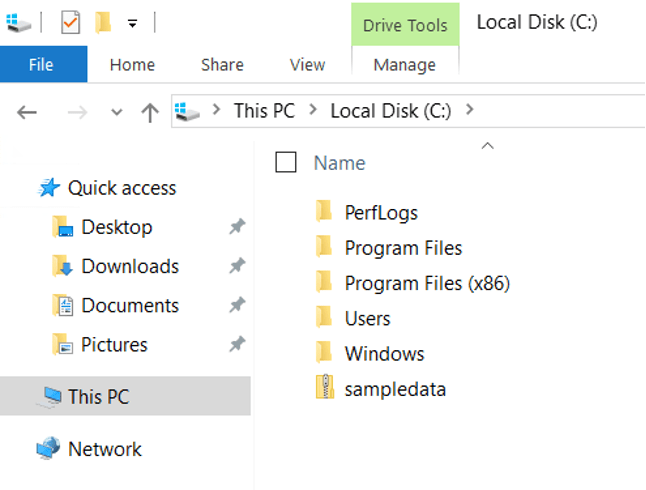
Now go to the C: mounted drive in the client and find the “sampledata” zip file.
We’re going to extract the files to the SMB share on your file server.
Right click on the sampledata file and choose to “Extract All…”
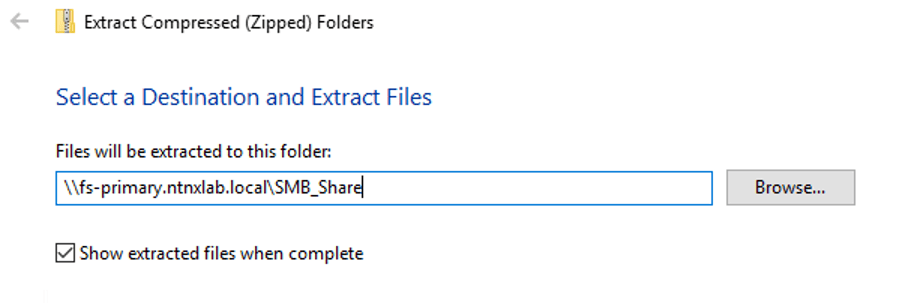
Enter in the file server share path, \\fs-primary.ntnxlab.local\SMB_Share, in this example, and choose Extract.
While the data is extracted to the share, let’s connect to File Analytics to see the activity.
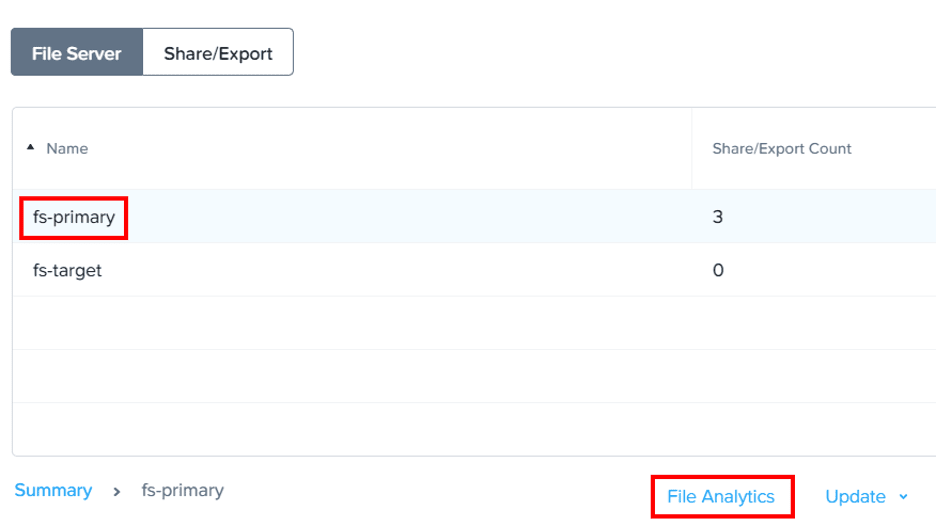
Go back to the AOSonGCP Prism Element File Server page, select your file server and choose File Analytics from the ribbon below the table.
This will launch you into the File Analytics UI where you’ll see data update in near real-time. You’ll need to refresh your browser to see changes.
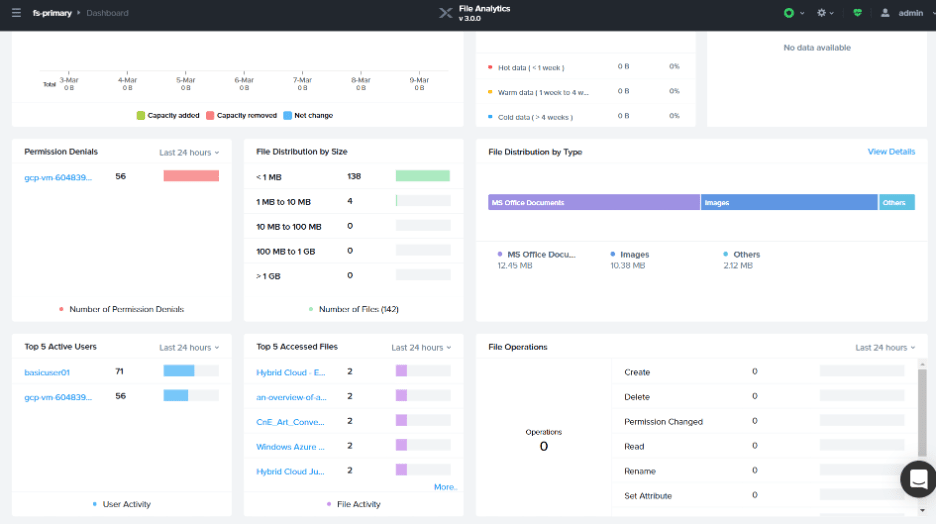
Be sure to try the Data Lens walk-thru for more details on the features of Data Lens and File Analytics.
The next thing we’ll look at is Self Service Restore, which is enabled against the SMB share. After an hour you will start to see the snapshots populate under the Previous Versions tab in Windows Explorer. For example, right click on the Sample Data folder and choose Properties. You’ll find the Previous Versions tab there.
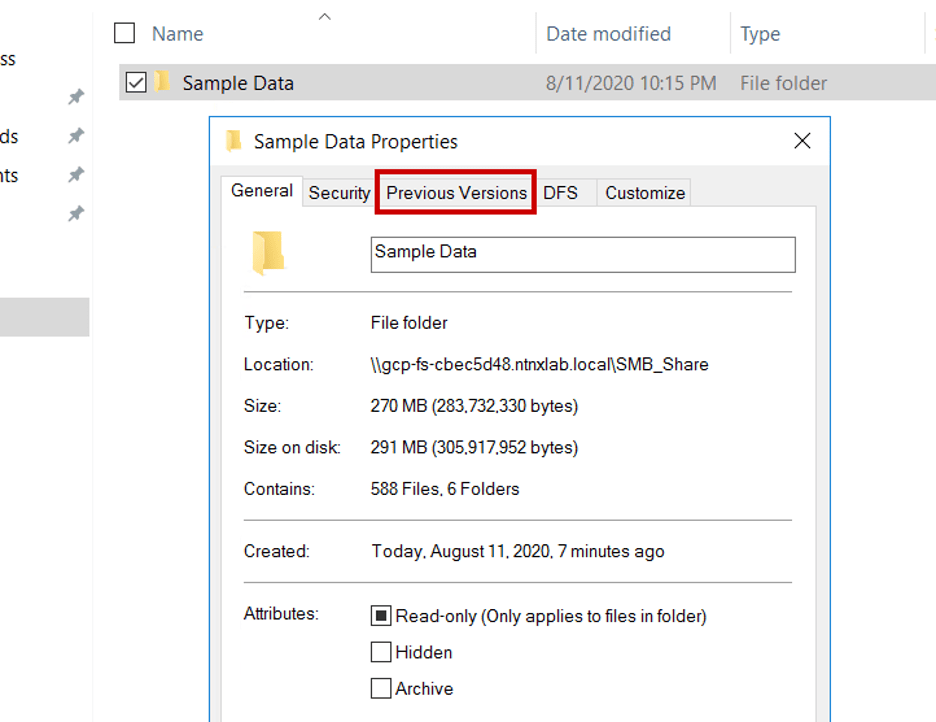
For more details, the Common Operations walk-thru shows you how to set the self service restore snapshot schedule for the file server.
If you’d like to interact with NFS exports using a Linux client… Go to the AOSonGCP File Server page again, click on the file server and click Launch Files Console. From within the console go to Configuration and then Update DNS Entries.
Choose the Manual radio button and take note of the IP addresses used by the client network of the file server. We’re going to use an IP address instead of a name to connect to an export in this example.
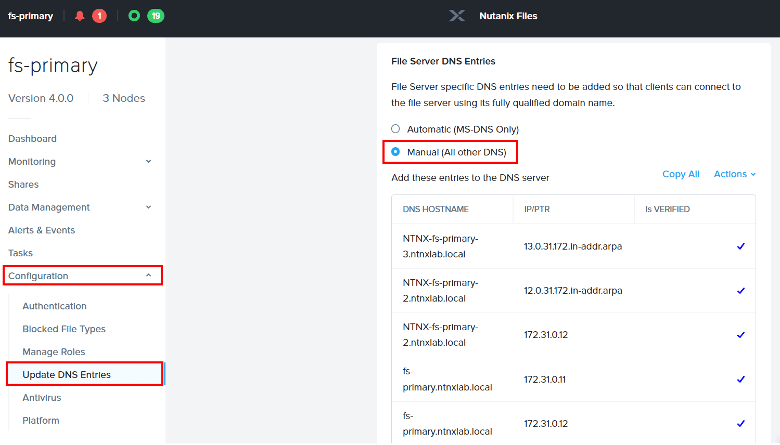
You’ll only need one of the IP addresses, so let’s choose 172.31.0.11.
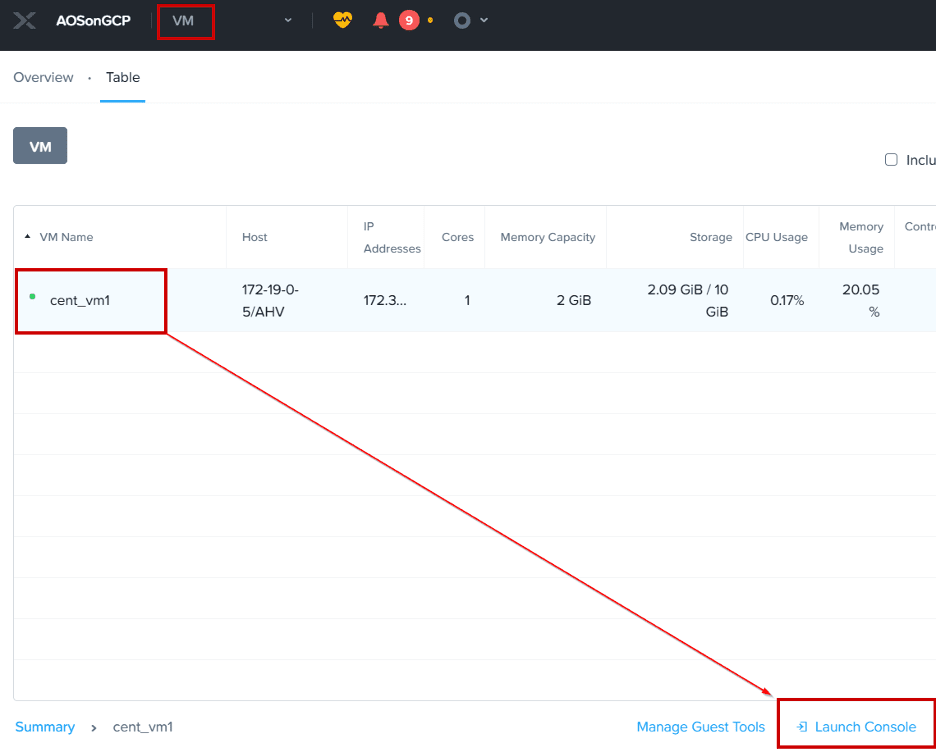
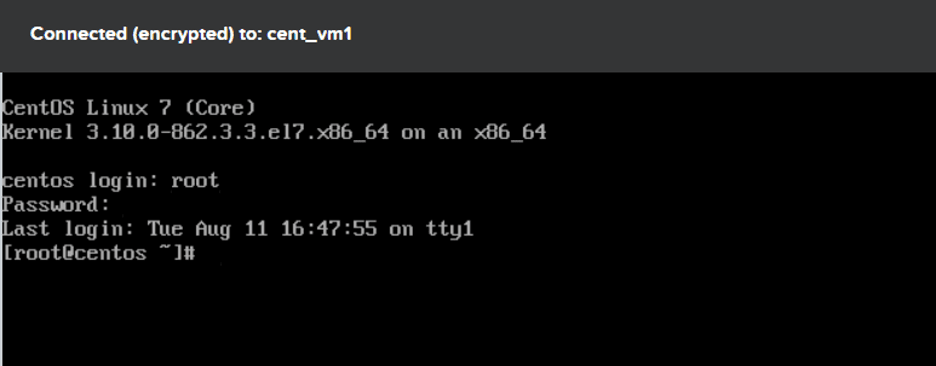
Now go to AOSonGCP Prism Element VM page and search for the “cent_vm1” virtual machine. Click on the VM and choose Launch Console from the ribbon below the table.
Log into the VM using:
User: root
Password: nutanix/4u
Run the following commands.
[root@centos ~] mkdir /mnt/NFS1
Note: Ensure NFS1 is in caps if you wish to run the script below.
[root@centos ~] mount 172.31.0.11:/NFS_Share /mnt/NFS1
[root@centos ~] touch /mnt/NFS1/file.txt
If you’d like to create more data we have a script you can run. Do the following.
[root@centos ~] python ./generate_data.py
Note: You can exit the running script with ctrl + z. The script will create 20,000 files and roughly 58.5 GB of data.
Now go check out File Analytics while the script runs.
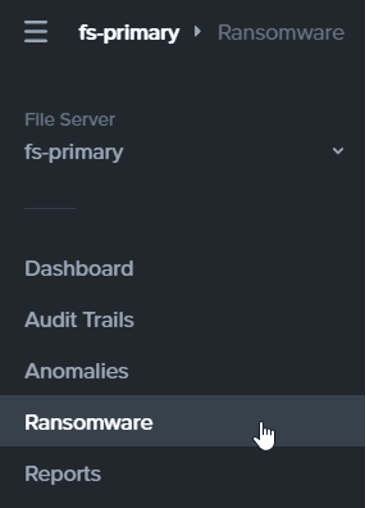
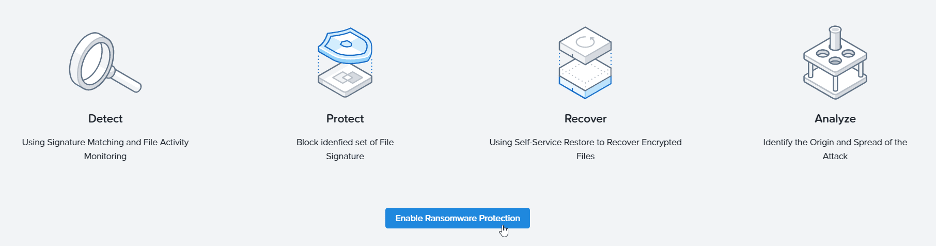
One last thing, let’s enable Ransomware protection. Go to the File Analytics menu and choose Ransomware
Choose Enable Ransomware Protection. Enabling protection will apply a ransomware specific file blocking list to the file server.
To cause a ransomware infection attempt, create a file called “audit.aaa” in the SMB_Share. For example, from a command line:
C:\Users\basicuser01>echo hello-world >> \\fs-primary.ntnxlab.local\SMB_Share\audit.aaa
Access is denied.
You should see the following event on the ransomware page.

Hopefully this is enough to get you started, have fun with the Nutanix Files Deep Dive.
 2020 Nutanix, Inc. All rights reserved. Nutanix, the Nutanix logo and the other Nutanix products and features mentioned on this post are registered trademarks or trademarks of Nutanix, Inc. in the United States and other countries. All other brand names mentioned on this post are for identification purposes only and may be the trademarks of their respective holder(s). This post may contain links to external websites that are not part of Nutanix.com. Nutanix does not control these sites and disclaims all responsibility for the content or accuracy of any external site. Our decision to link to an external site should not be considered an endorsement of any content on such a site.