Anyone working with containers and Kubernetes knows the value of a rock-solid container registry. In this post, we’ll show you how to deploy JFrog Artifactory Enterprise, in a highly available configuration onto Kubernetes with Nutanix Karbon. If you’re not familiar with Artifactory, it is a binary repository manager, allowing you to easily store and categorize all of your software artifacts. While this is an important tool for any enterprise, it is especially critical for a successful DevOps toolchain. To get a free trial of Artifactory Enterprise, navigate over to JFrog’s website and fill out the form.
One of the most challenging aspects of any stateful Kubernetes application is persistent storage. However, with Nutanix Karbon and our integrated CSI Volume Driver, managing your persistent storage is extremely simple. In this blog post we’ll be using the default Storage Class created with every Karbon cluster deployment, which uses Nutanix Volumes on the backend.
Prerequisites
We’ll be installing Artifactory Enterprise in HA mode via a Helm chart, so basic knowledge of Helm is recommended, but not required. If you’re just getting started with Helm, take a look at this Nutanix Community forum post which runs through using Tillerless Helm with Nutanix Karbon.The default Artifactory HA Helm chart installs an Nginx server, which utilizes the built in LoadBalancer Kubernetes resource. For Nginx to be assigned an External IP, MetalLB in Layer 2 mode was utilized. To install MetalLB, first apply the MetalLB manifest, then create a Config Map with a pool of IP addresses available for MetalLB to hand out.
code:
$ kubectl apply -f https://raw.githubusercontent.com/google/metallb/v0.7.3/manifests/metallb.yaml

$ cat metallb-config.yaml

apiVersion: v1

kind: ConfigMap

metadata:

  namespace: metallb-system

  name: config

data:

  config: |

    address-pools:

    - name: default

      protocol: layer2

      addresses:

      - 10.45.100.11-10.45.100.15 # Substitute your IPs here

$ kubectl apply -f metallb-config.yaml
Artifactory Deployment
To start the Artifactory deployment, open up a terminal from a MacOS or Linux machine that has Helm installed. For more info, please see our Tillerless Helm on Karbon blog post. We’ll first initialize our tillerless helm, and then start the service.code:
$ helm init --client-only
$ helm tiller start
Next, we’ll add the JFrog repo to helm, and then install Artifactory HA, with one simple command. Since every Karbon cluster has a default Storage Class based on Nutanix Volumes automatically created at cluster creation, there’s no need to configure storage, which typically is the most challenging aspect of Kubernetes.
code:
$ helm repo add jfrog https://charts.jfrog.io
$ helm install --name artifactory-demo jfrog/artifactory-ha
Next, monitor the pods, services, and persistent volume claims. Ensure that all pods change to a Running state, the Nginx Service gets an External-IP, and all volume claims are Bound.
code:
$ kubectl get pods

NAME                                           READY   STATUS    RESTARTS   AGE

artifactory-demo-artifactory-ha-member-0       1/1     Running   0          4m52s

artifactory-demo-artifactory-ha-member-1       1/1     Running   0          2m14s

artifactory-demo-artifactory-ha-primary-0      1/1     Running   0          4m52s

artifactory-demo-nginx-548c7b744d-czngv        1/1     Running   0          4m52s

artifactory-demo-postgresql-6f66bb8c8b-k5zkf   1/1     Running   0          4m52s


$ kubectl get svc

NAME                                      TYPE           CLUSTER-IP       EXTERNAL-IP    PORT(S)                      AGE

artifactory-demo-artifactory-ha           ClusterIP      172.19.188.165            8081/TCP                     4m52s

artifactory-demo-artifactory-ha-primary   ClusterIP      172.19.245.160            8081/TCP                     4m52s

artifactory-demo-nginx                    LoadBalancer   172.19.254.27    10.45.100.11   80:31895/TCP,443:30121/TCP   4m52s

artifactory-demo-postgresql               ClusterIP      172.19.101.143            5432/TCP                     4m52s

kubernetes                                ClusterIP      172.19.0.1                443/TCP                      16m


$ kubectl get pvc

NAME                                               STATUS   VOLUME                                     CAPACITY   ACCESS MODES   STORAGECLASS           AGE

artifactory-demo-postgresql                        Bound    pvc-22558e21-4042-11e9-aafc-506b8d53468e   50Gi       RWO            default-storageclass   4m53s

volume-artifactory-demo-artifactory-ha-member-0    Bound    pvc-227e62e2-4042-11e9-aafc-506b8d53468e   200Gi      RWO            default-storageclass   4m52s

volume-artifactory-demo-artifactory-ha-member-1    Bound    pvc-80ca05f3-4042-11e9-aafc-506b8d53468e   200Gi      RWO            default-storageclass   2m14s

volume-artifactory-demo-artifactory-ha-primary-0   Bound    pvc-2282341f-4042-11e9-aafc-506b8d53468e   200Gi      RWO            default-storageclass   4m52s
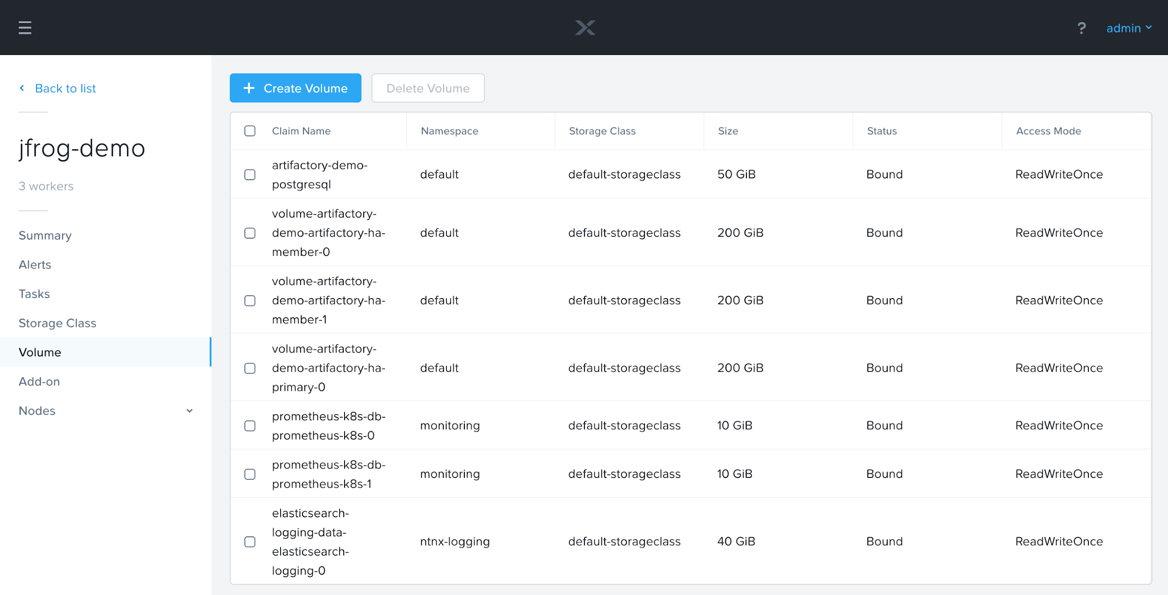
Take note that all of the Persistent Volume Claims are created from our default Storage Class that gets created with every Karbon cluster. You’ll also see the matching Volumes in the Karbon UI:
You’ll note that the default size of the Persistent Volume Claims are 200GiB. If this is not enough for your environment, you have several options. One option is to set the size of the PVC to a larger number at deployment:
code:
$ helm install --name artifactory-demo --set artifactory.persistence.size="1Ti" jfrog/artifactory-ha
Another option would be to add NFS storage, like Nutanix Files, or S3 compliant Object storage, like Nutanix Buckets. These are also set via helm settings, and can be defined before initial deployment or later with a helm upgrade command. For more information, please see the Artifactory storage section of the helm chart.
If for any reason you need to view the logs of a pod, in order to troubleshoot or verify configuration, you can do so with the following command.
code:
$ kubectl logs | less
Once all of your pods are running, and PVCs are bound, you can access Artifactory HA via the LoadBalancer External IP listed above, or by running the following two commands.
code:
$ export SERVICE_IP=$(kubectl get svc --namespace default artifactory-demo-nginx -o jsonpath='{.status.loadBalancer.ingress[0].ip}')
$ echo http://$SERVICE_IP/
It is recommended that you add this IP to your company’s domain server.
Setup
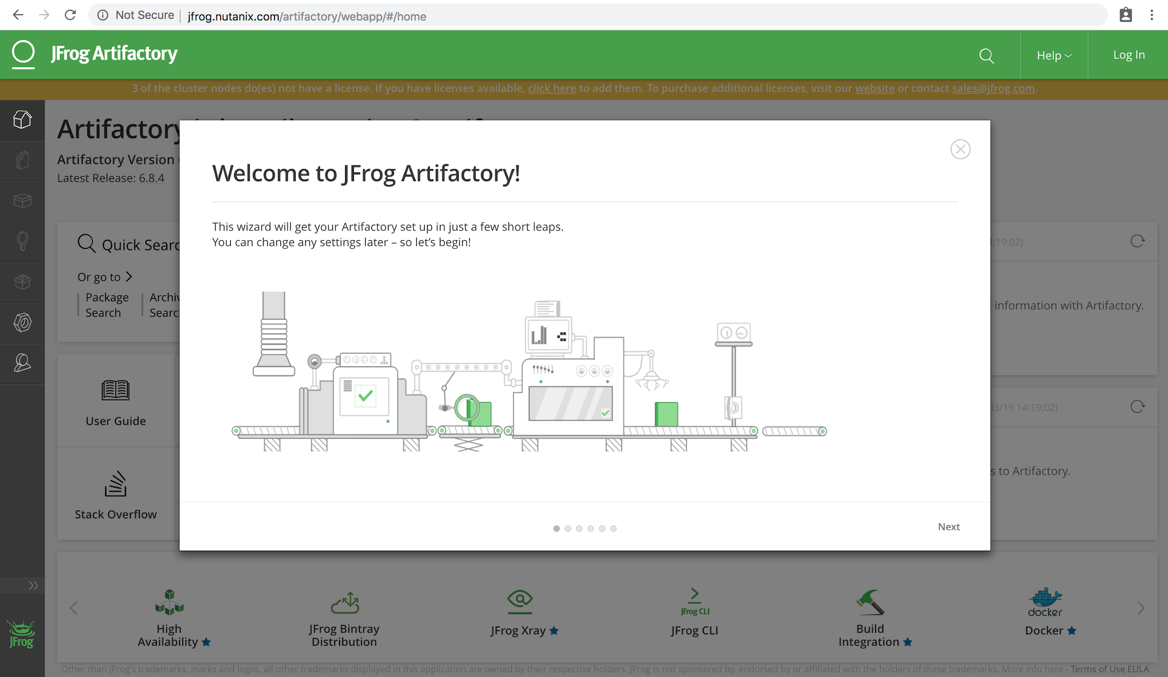
Enter the domain name, or IP that was just gathered into a web browser, where you should see a “Welcome to JFrog Artifactory” message.Click Next, where you’ll be prompted for your license keys.
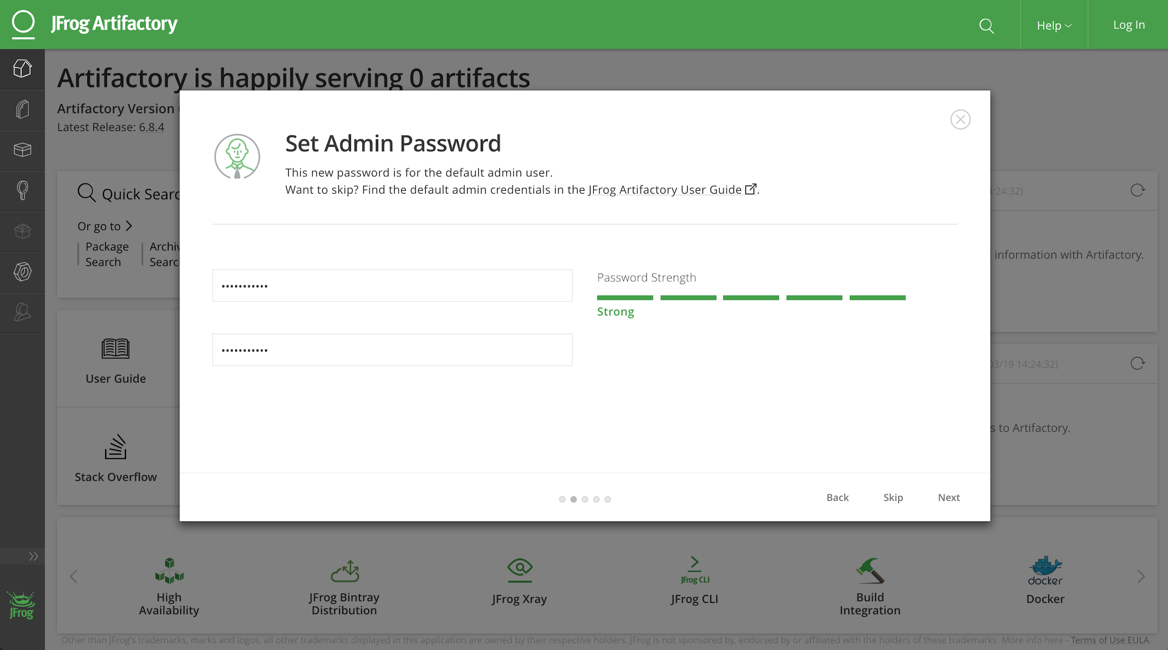
Paste your keys in, and click next, where you’ll be prompted to set a new admin password.
After entering a strong password, click Next. Depending on your environment, a proxy server may be required to access the internet. If so, enter your proxy server information on the page that appears. If a proxy server is not required, click Skip.
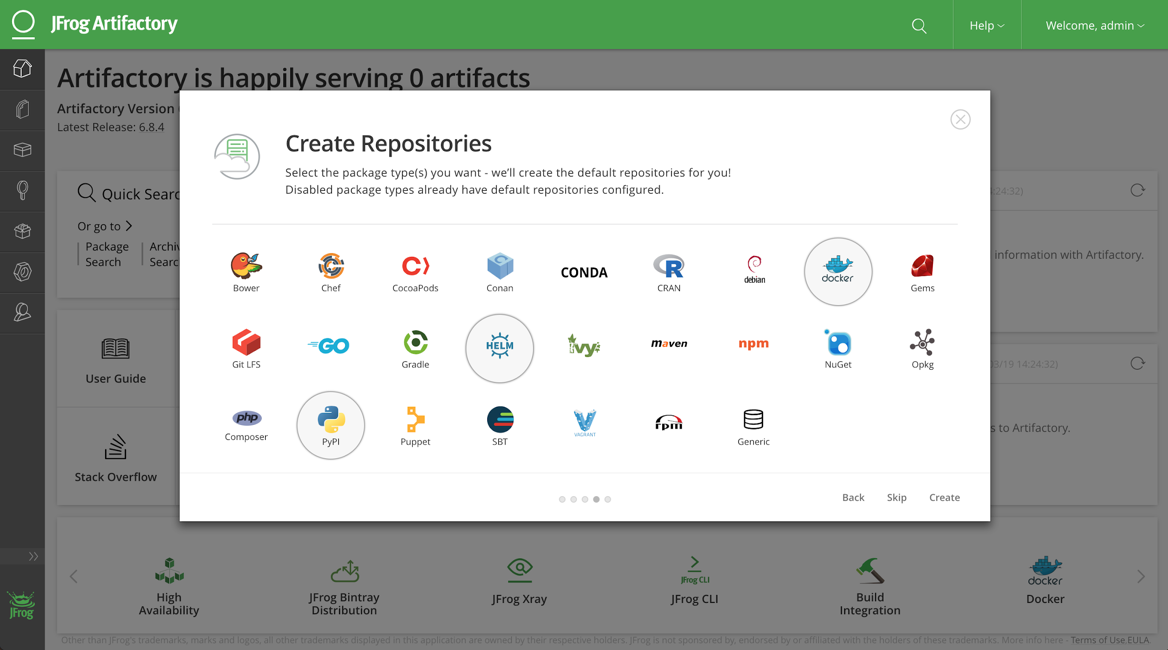
On the next page, you have the option of selecting the package type(s) that you want repositories created for. Choose your package(s) and click Create.
Finally, you should get a notification stating “Artifactory on-boarding complete!” Click Finish to start using Artifactory.
Example Use Case
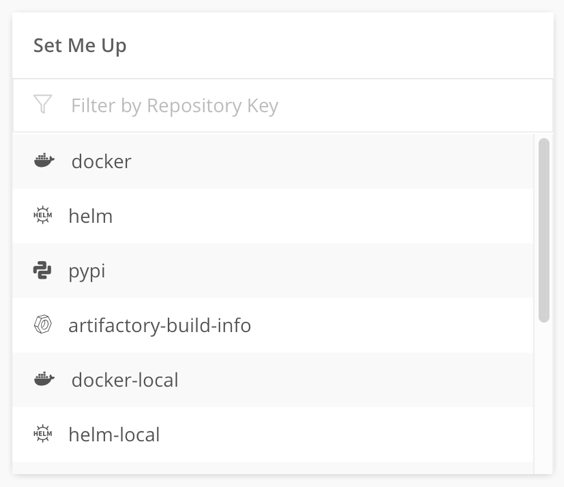
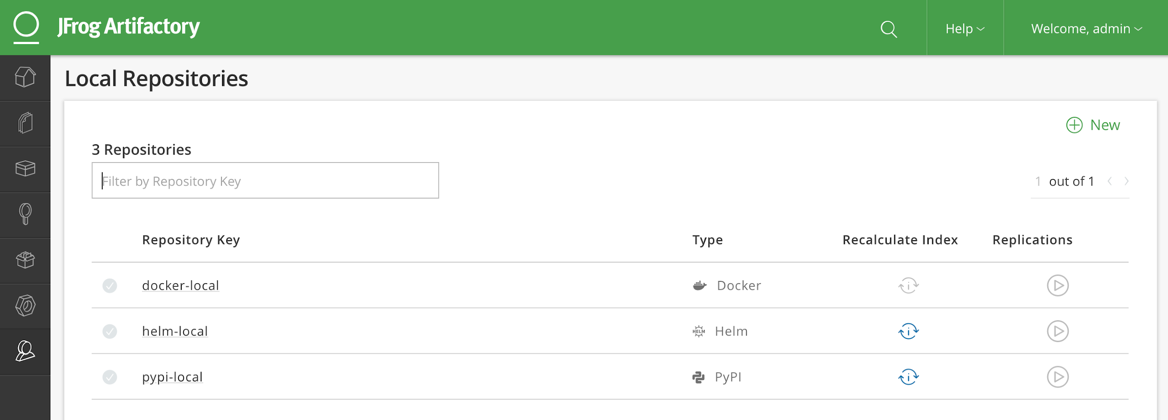
For each repository added in the previous step, you’ll find an entry in the Set Me Up box in the middle of the homepage. We’ll be walking through setting up docker, but for any other registry, we recommend starting here.As an example, we’re going to walk through configuring Artifactory as a container registry. If you did not add docker in the previous step, and wish to follow along, navigate to Admin > Repositories > Local, and then click the + New button in the upper right.
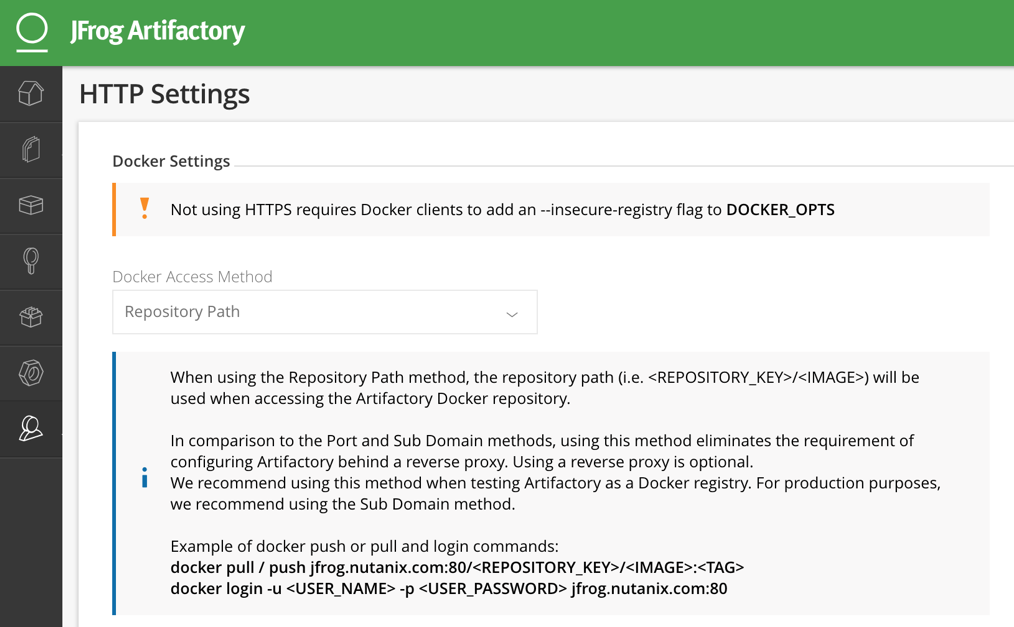
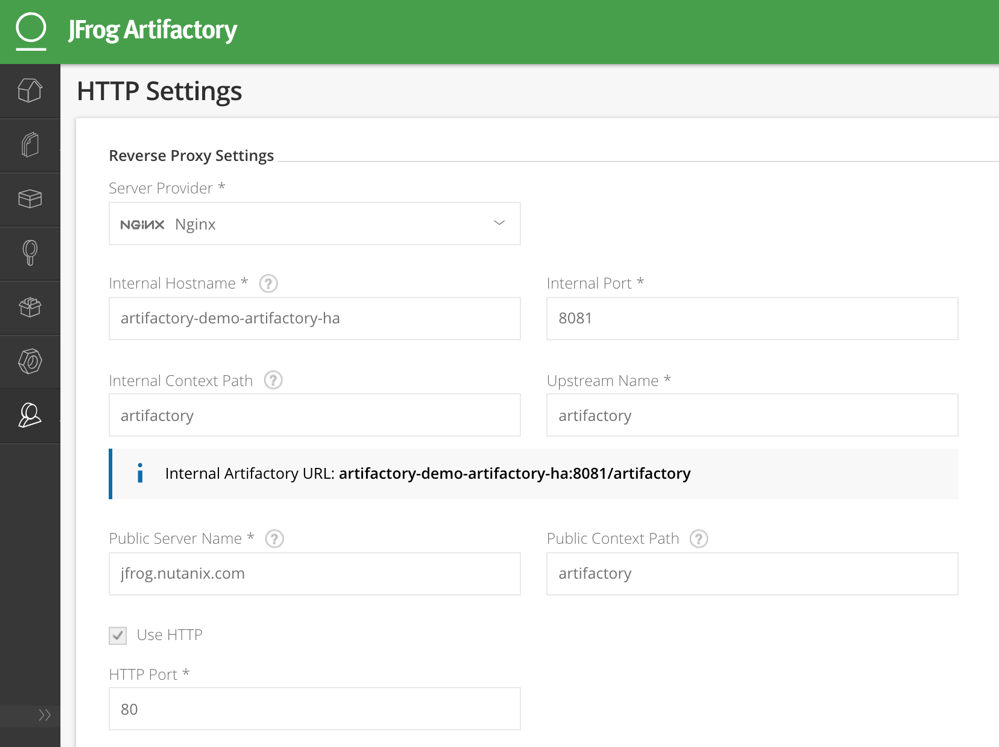
In order to use Artifactory as docker registry it's mandatory to use a Reverse Proxy. Luckily the default helm chart deploys an Nginx server that we can use. As outlined in ReverseProxyConfiguration.md, there are a couple of steps to take within Artifactory.
Navigate to Admin > Configuration > HTTP Settings, and change or fill in the following fields, leaving all others as default:
● Docker Access Method: Repository Path
● Reverse Proxy Server Provider: Nginx
● Internal Hostname: Name of the Artifactory Kubernetes Service, in my case artifactory-demo-artifactory-ha
Click Save, upon which the changes will automatically be pushed to the Nginx server. Back in your MacOS or Linux terminal, we’re going to push a docker image to our new repository. In the event you do not have a local image, let’s pull one first.
code:
$ docker pull python:3.5
Next, we’ll set a variable to make copy and pasting easier (be sure to substitute our hostname for your hostname or IP), and then log in to our new repository with docker login. At the password prompt, enter your Artifactory credentials from the previous step.
code:
$ export ARTIFACTORY="jfrog.nutanix.com"
$ docker login -u admin ${ARTIFACTORY}
Password:
Login Succeeded
Finally, we’ll tag our python image, and push our image to our Artifactory repository.
code:
$ docker tag python:3.5 ${ARTIFACTORY}/docker/python:3.5
$ docker push ${ARTIFACTORY}/docker/python:3.5
The push refers to repository [jfrog.nutanix.com/docker/python]
a83742433b45: Pushed
319fab820b58: Pushed
3c74ba240996: Pushed
526dede64623: Pushed
7de462056991: Pushed
3443d6cf0f1f: Pushed
f3a38968d075: Pushed
a327787b3c73: Pushed
5bb0785f2eee: Pushed
3.5: digest: sha256:4c257cd3a276806e90aacd7d470b361869178ee023613b2d942fdc292a3068b4 size: 2218
Back in the Artifactory UI, we should see our new image:
Summary
In this blog, we showed how easy it is to deploy Artifactory HA on Nutanix Karbon by utilizing JFrog’s Helm Chart and the built in Nutanix CSI driver. We then stepped through an example use case of creating an Artifactory Docker Repository, and pushing a docker image. However, docker is just one type of dozens of different packages that Artifactory can manage. Thanks for your time today!© 2019 Nutanix, Inc. All rights reserved. Nutanix, the Nutanix logo and the other Nutanix products and features mentioned herein are registered trademarks or trademarks of Nutanix, Inc. in the United States and other countries. All other brand names mentioned herein are for identification purposes only and may be the trademarks of their respective holder(s).

