
This post was authored by Michael Haigh, Technical Marketing Engineer Nutanix
Countless studies have shown that reducing the amount of time for developers to receive feedback on code changes improves software quality. Automating the build, test, and deployment of software with tools such as Jenkins is one of the best ways to accelerate software development. If you’re unfamiliar with Jenkins you can learn more on their website here.
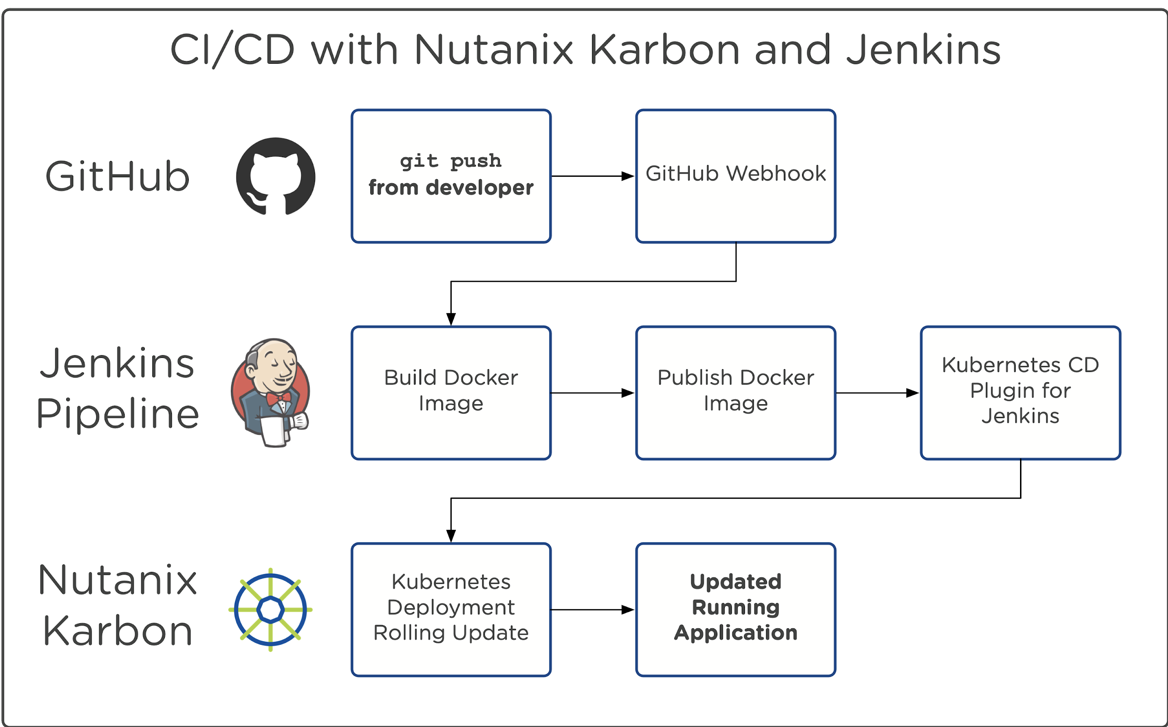
In this blog post, we’ll walk through deploying Jenkins onto Nutanix Karbon with a Helm chart. We’ll then configure an example GitHub repository for our code base. Each time we push our local code changes to our GitHub repo, a Jenkins pipeline will be initiated, which will build our new docker image, push that image to DockerHub, and automatically update the deployed application.
Since this will be a more involved post than usual, we’ll be breaking it up into a 3 part series. Stay tuned for the next posts in the coming weeks!
Pre-requisites
We’ll be deploying Jenkins with a Helm chart, so basic knowledge of Helm is recommended. If you’ve never used Helm before, I’d recommend you check out my colleague Jose’s Tillerless Helm blog post here. Additionally, we’ll be deploying Jenkins with a LoadBalancer Service, so to follow along please install MetalLB onto your Karbon Kubernetes cluster. Please see my previous blog post for more information on Load Balancers and MetalLB.
Deploying Jenkins
As mentioned, if you haven’t already:
- Deploy a Karbon Kubernetes cluster
- Install Helm on your workstation
- Initialize in client-only mode (
helm init --client-only) - Install the helm-tiller plugin (
helm plugin install https://github.com/rimusz/helm-tiller) - Start helm tiller (
helm tiller start) - Install MetalLB on your Karbon Kubernetes cluster
- Apply MetalLB ConfigMap with a range of available IPs
Since we’ll be customizing the default Helm chart with several different values, we’ll be storing these settings in a values.yaml file. We recommend that you store all of your deployment values yamls in your preferred source code repository to properly track your configuration. To create the values yaml, run the following command:
$ cat << EOF > jenkins-config.yaml
master:
  installPlugins:
    - kubernetes
    - kubernetes-cd
    - workflow-aggregator
    - workflow-job
    - credentials-binding
    - git
    - github
    - nutanix-calm
    - docker-plugin
    - timestamper
agent:
  image: "odavid/jenkins-jnlp-slave"
  imageTag: "latest"
  privileged: true
  envVars:
   - name: DIND
     value: true
persistence:
  size: 100Gi
EOF
Please note that we’re not using the official Jenkins JNLP Agent Docker Image due to a lack of docker-in-docker support. Rather, we’re using this image which is based on the JNLP image, plus the ability to run docker-in-docker. Since this is a community provided image, we cannot guarantee security. If you’re planning on deploying this architecture in production, we recommend that you build your own JNLP image.
Next, we’ll install Jenkins with the following command (note we’re specifying the jenkins-config.yaml file we just created):
$ helm install --namespace jenkins --name jenkins -f jenkins-config.yaml stable/jenkinsThe output of that command will contain information about all of the resources deployed by our Helm chart. It also provides information on how to access your Jenkins environment in the Notes section:
NOTES:
1. Get your 'admin' user password by running:
  printf $(kubectl get secret --namespace jenkins jenkins -o jsonpath="{.data.jenkins-admin-password}" | base64 --decode);echo
2. Get the Jenkins URL to visit by running these commands in the same shell:
  NOTE: It may take a few minutes for the LoadBalancer IP to be available.
        You can watch the status of by running 'kubectl get svc --namespace jenkins -w jenkins'
  export SERVICE_IP=$(kubectl get svc --namespace jenkins jenkins --template "{{ range (index .status.loadBalancer.ingress 0) }}{{ . }}{{ end }}")
  echo http://$SERVICE_IP:80/login

3. Login with the password from step 1 and the username: admin
Follow these steps to get your admin password, and the IP of your Jenkins server. With that information, you should be able to successfully log in to the Jenkins UI:
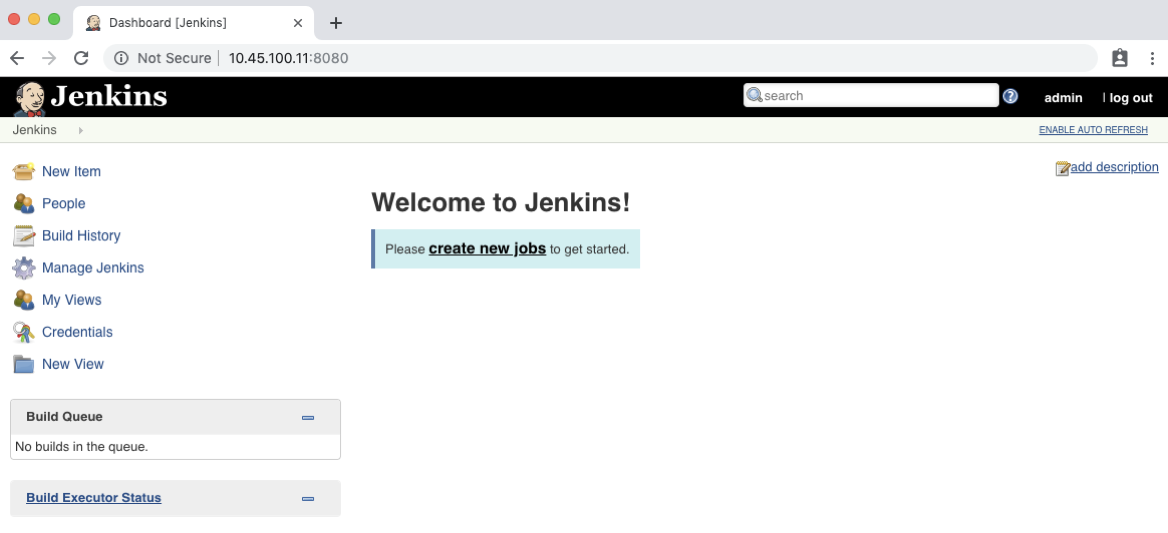
Note: we do recommend that you change the default admin password after initial log in.
GitHub Setup
In this example we’ll be making use of Paul Bower’s hello-kubernetes application. You’re welcome to follow along exactly, or use your own application. Depending on your company’s networking policies and configuration, you may need to use an internal git server, or a tool like ngrok, since the Jenkins server we just deployed is likely within your internal company network.
If your internal network is completely isolated from the internet, you’ll need to use an internal git server, which we’ll cover in this post first. If your internal network has the ability to reach out to the internet, then a tool like ngrok is adequate, however this is only recommended for proof of concepts, not production or long-term deployments. We’ll cover this option second. Please note that you only need to complete one option (A or  , not both.
Option A: Internal GitHub Setup
In this workflow, we’re utilizing an internal GitHub server to allow communication to our internal Jenkins server. The first step is to click the green Clone or download button, and then the copy to clipboard icon.
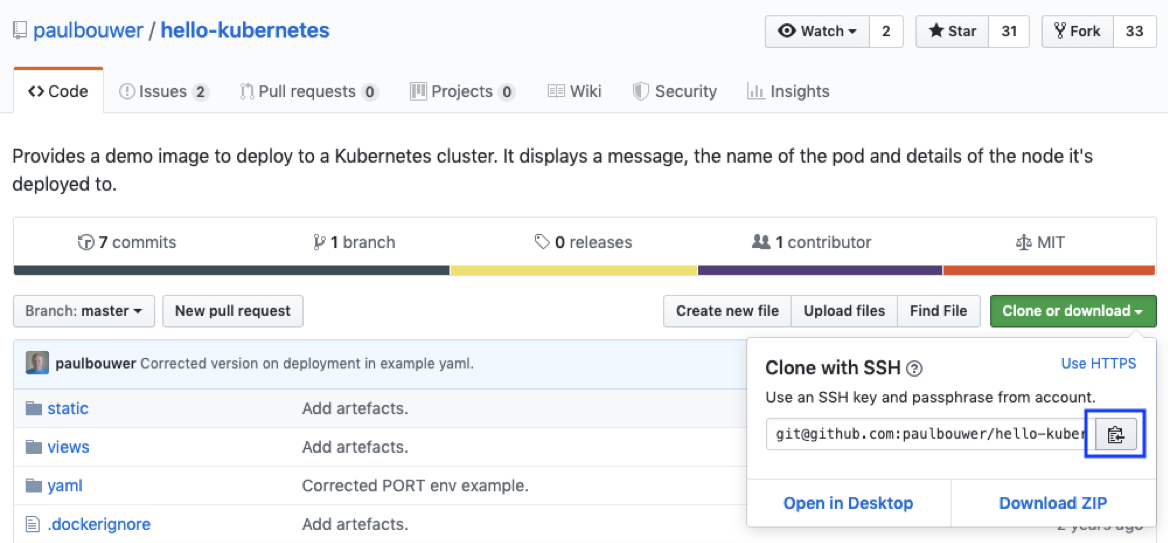
Next, from your workstation, use git to clone the repository (note: if you’re using HTTPS your command will look slightly different), and then change into the new directory:
$ git clone git@github.com:paulbouwer/hello-kubernetes.git
$ cd hello-kubernetes/
Now, from within your internal GitHub, create a new repository named hello-kubernetes:
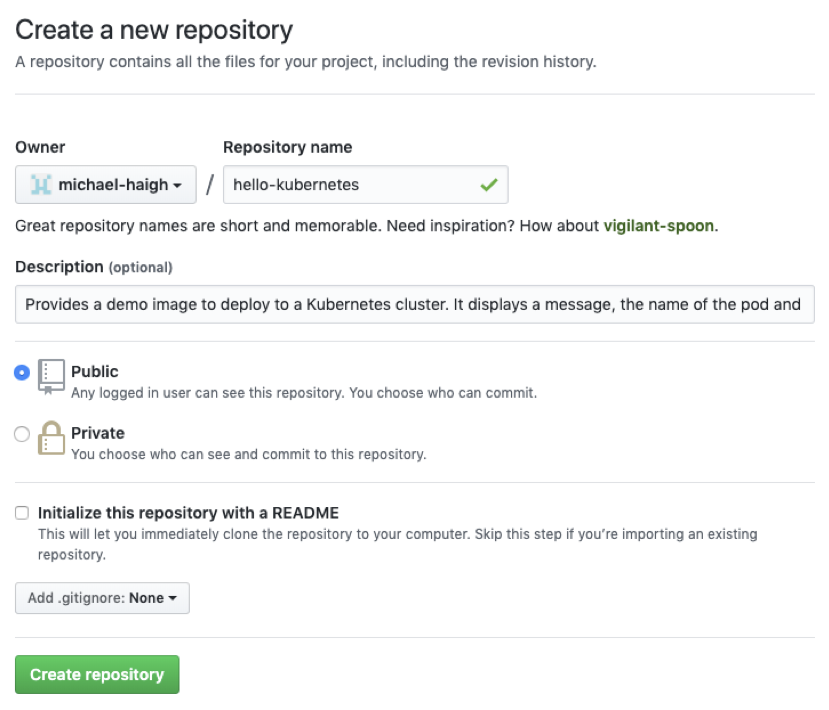
Back in your workstation, we need to change the remote-url to our new repository. We can do that, verify our change, and push the changes to our new repo with the following commands:
$ git remote set-url origin git@your-internal-github.com:your-username/hello-kubernetes.git
$ git remote -v
$ git push -u origin master
In your internal GitHub, you should now see the same code and structure as the original hello-kubernetes repo by Paul Bower. All that’s left for our GitHub setup is to add a webhook, which is covered after the ngrok section. If you’re using an internal GitHub, go ahead and skip to that section.
Option B: Public GitHub and NGrok Setup
In this workflow, we’ll expose our Jenkins server to the internet via ngrok. As a reminder, this is not recommended for production or long term use. In the upper right corner of the hello-kubernetes repository, click the fork button to fork the repository into your user account. In the newly forked repository, click the green Clone or download button, and copy the link:
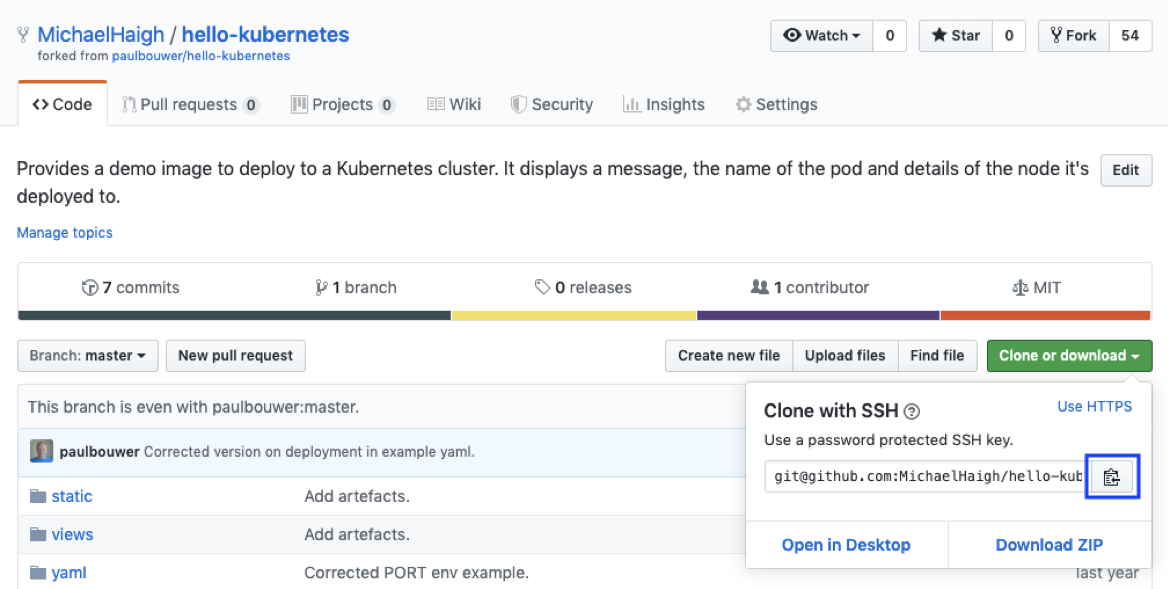
Next, from your workstation, use git to clone the new repository (note: if you’re using HTTPS your command will look slightly different), and then change into the new directory:
$ git clone git@github.com:YourUsername/hello-kubernetes.git
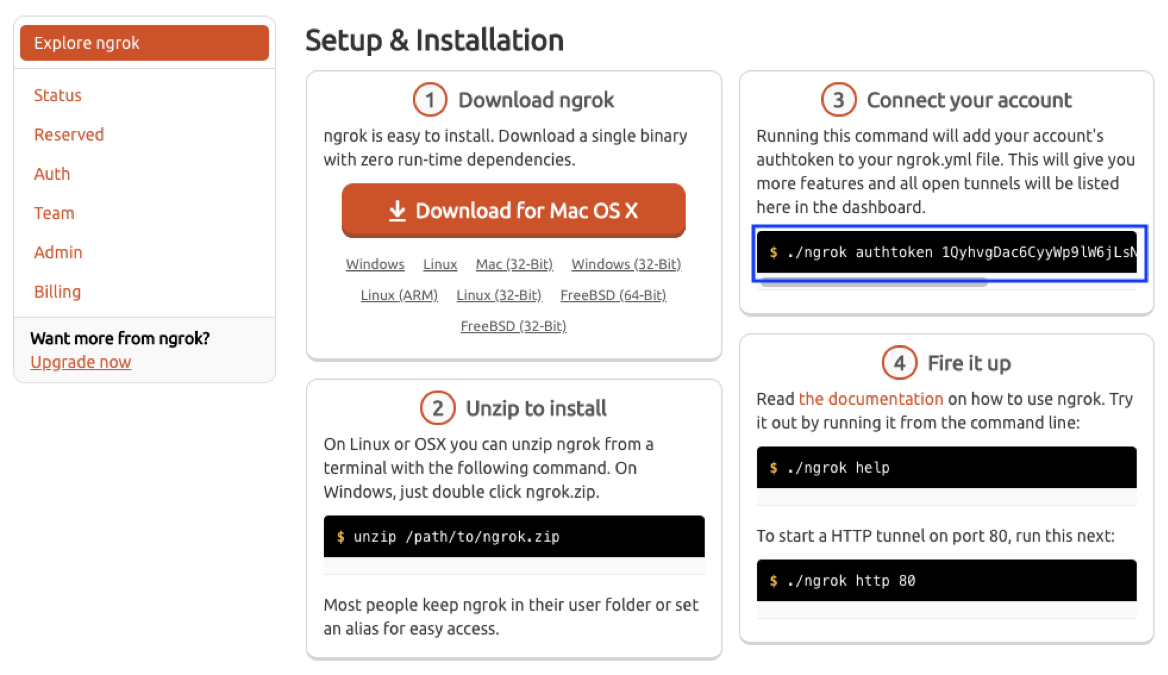
$ cd hello-kubernetes/That’s all that’s required from a GitHub perspective. Next, create or log in to your ngrok account, and head over to the ngrok dashboard. Take note of your authtoken in step 3, which will be used towards the end of this section.
Head back into your workstation CLI, and run the following commands. This will configure ngrok in the master pod, start ngrok in the background, and then get the public URL that Jenkins will be exposed upon.
$ exec -n jenkins `kubectl -n jenkins get pods | grep -v NAME | awk '{print $1}'` -it /bin/bash
$ wget https://bin.equinox.io/c/4VmDzA7iaHb/ngrok-stable-linux-amd64.zip
$ unzip ngrok-stable-linux-amd64.zip
$ ./ngrok authtoken <your-authtoken-here>
$ nohup ./ngrok http 8080 &
$ curl http://localhost:4040/api/tunnels
$ exit
In the output of the curl command look for the public_url key, which will contain your personal public URL, such as https://92832de0.ngrok.io (your value prior to ngrok in the URL will be different). You should now be able to log into your Jenkins instance using this URL.
GitHub Webhook Setup
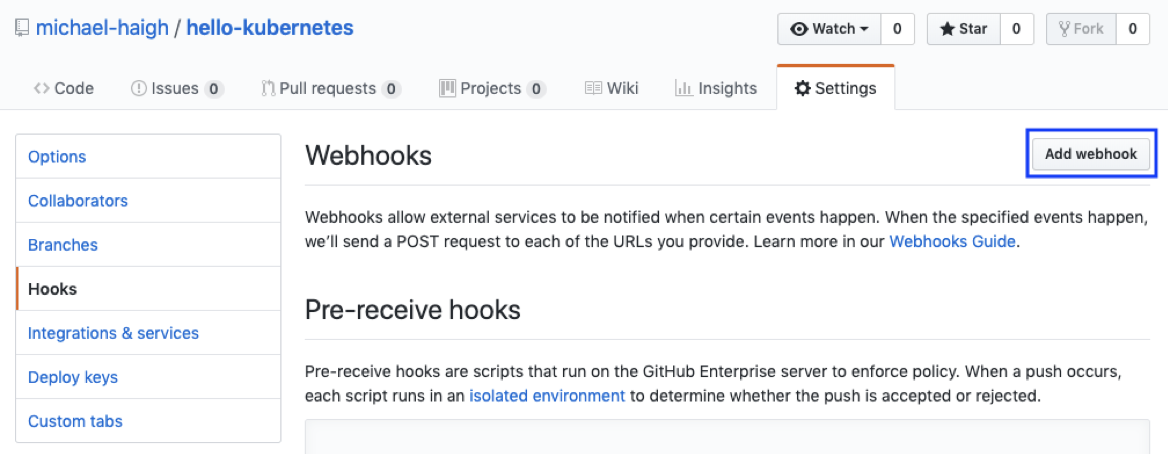
Regardless of which method we used to allow our Jenkins and GitHub servers to communicate, the next step is to create a GitHub webhook. This will cause GitHub to send a webhook each time a developer pushes a new commit. To create a Webhook, click the Settings button along the top, then the Hooks option along the left, and finally the Add webhook button on the right:
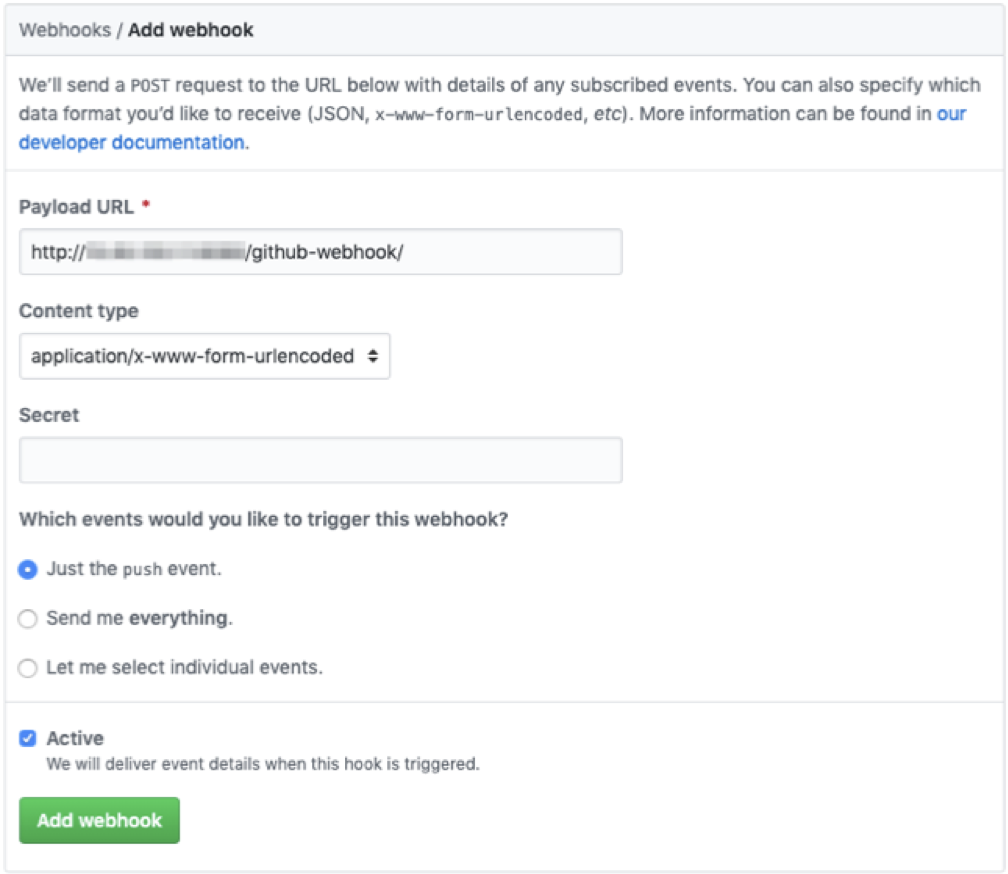
On the page that appears, paste in your Jenkins URL, and append github-webhook/ to the end. If you’re using an internal GitHub (option A), be sure to leave port 8080 in the URL. If you’re using ngrok (option , then your URL would appear as https://92832de0.ngrok.io/github-webhook/ (be sure to use your unique ngrok URL), where no port is needed as we specified port 8080 when configuring ngrok. Leave all other fields as default, and click the Add webhook button.
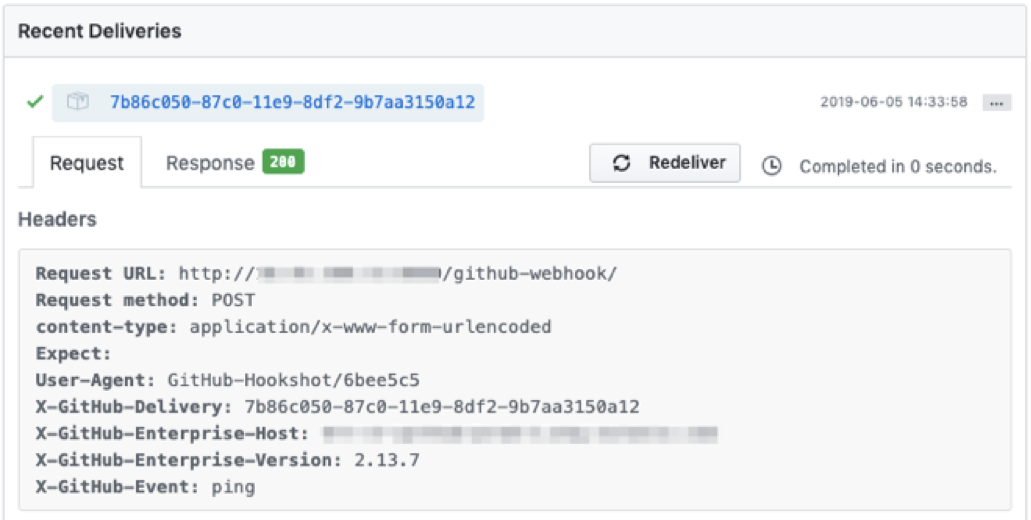
Once you’ve added the webhook, you’ll be navigated back a page to the Webhooks summary. Select the webhook you just created, and if everything was done correctly, you should see a successful test delivery:
DockerHub Setup
After a GitHub commit triggers a Jenkins build, and Jenkins successfully builds our new docker image, it needs some place to store the image. In this example we’ll be using DockerHub, but feel free to use another image repository that you’re more comfortable with.
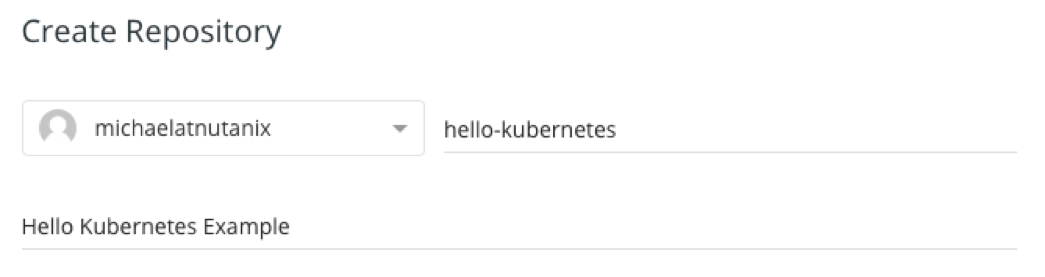
First, login to DockerHub and click the Create Repository button:

Then name the repository hello-kubernetes, give it a description, leave all other fields as default, and click Create. That’s it! We’ve successfully created a new DockerHub repository to store our docker images.
Summary
In this post, we’ve successfully deployed Jenkins onto Nutanix Karbon, configured our GitHub repository, and created a DockerHub repository to store our images. Stay tuned for the next post, where we’ll be configuring Jenkins and creating our Jenkins Pipeline!
 ️ 2019 Nutanix, Inc. All rights reserved. Nutanix, the Nutanix logo and the other Nutanix products and features mentioned herein are registered trademarks or trademarks of Nutanix, Inc. in the United States and other countries. All other brand names mentioned herein are for identification purposes only and may be the trademarks of their respective holder(s).