

Uploading an image to Xi
- Log in to the Xi portal and upload the VM-Series kernel-based VM(KVM) qcow2 image. (This image should be available on the Palo Alto website).
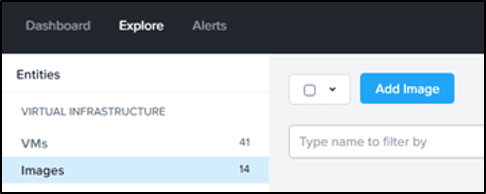
- Select Explore > Images, then select Add Image.
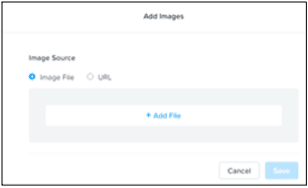
- Select Image File, then + Add File.
- Add the VM-Series KVM image from your computer and select Save.
NOTE: If you are unable to upload the image from your computer, use the URL method and provide the image URL to upload the image.
Creating Subnets on Xi
Two VPCs (Production and Test) are available by default in the Xi Cloud Services portal. You can’t add new VPCs in Xi Cloud Services, but you can create virtual subnets in the VPCs for hosting VMs, and configure policies to secure them. You can update the VPCs to specify settings such as DNS and DHCP.
Nutanix will create subnets in the production VPC, since post-failover (Planned/Unplanned) VMs are brought up in production VPC. However, if you need a subnet dedicated for a virtual firewall, you would need to create a subnet by following the steps mentioned below:

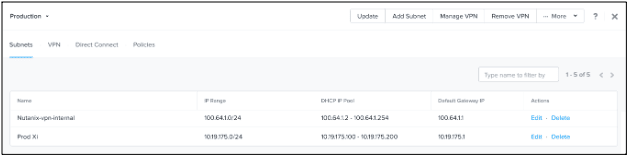
- Select Explore > Virtual Private Clouds > Production > Add Subnet.
- Enter the subnet details with DHCP IP pool and select Save.
NOTE: To have isolation, create two private subnets that are not configured on-prem and different from the subnet that would be used by the User VMs post failover or existing live VMs currently running on Xi.
NOTE: Avoid using 100.64.1.0/24 subnet, which is being used by Nutanix-vpn-internal.
Once both the subnets are created, request Floating IPs:
- Select Explore > Floating IPs > Request for 1 Floating IP.
- Select Save.
For a single-legged firewall with one inside and one management interface, the floating IP will be assigned to the management interface of the firewall, and Nutanix can open policies.
Creating a Palo Alto Networks VM-Series VM
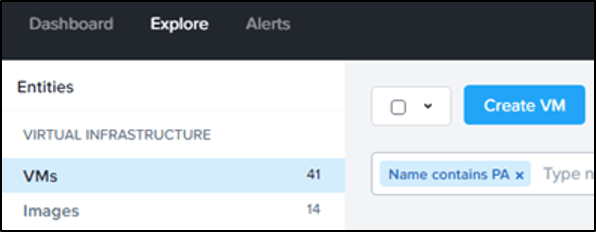
- Select Explore > VMs > Create VM.
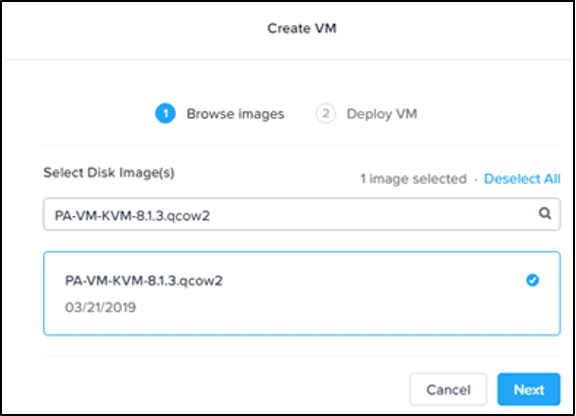
- Select the VM-Series disk image and select Next.
- In the General Settings section, in the Name field, enter the name, then select the appropriate timezone.
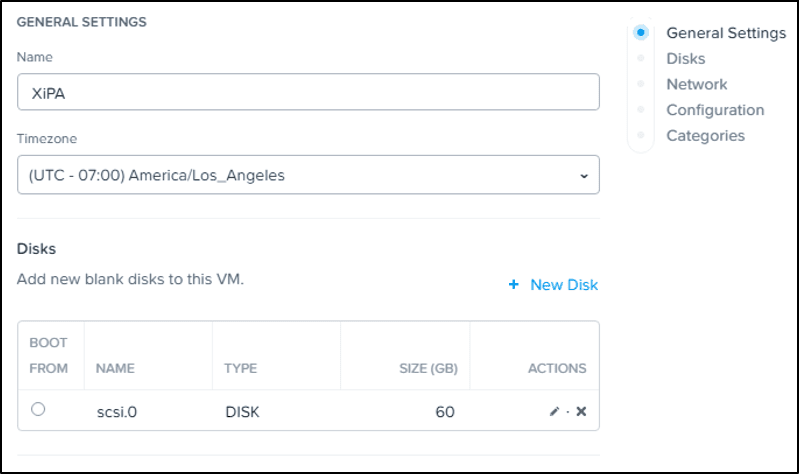
- In the Disks section, select + New Disk, and attach a disk named scsi.0 with the DISK type and size set to 60GB.
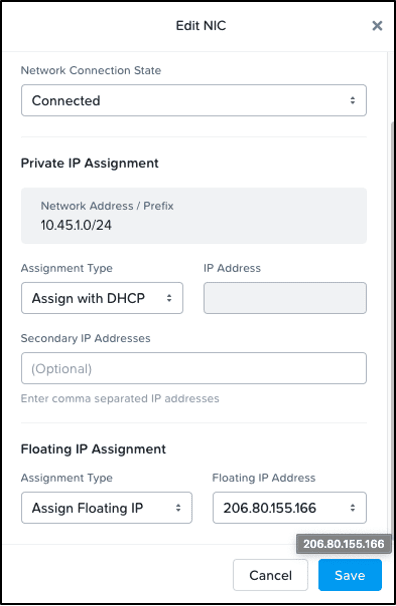
- In the Network section, select Connect to Network > Select Production along with the Subnet that you created in the last section.
- Assign a static IP and enter the desired IP address from the subnet range, then select Save.
NOTE: Attach two NICs and make sure to select public IP assignment and assign the requested floating IP for the management interface as shown in the screenshot below:
- Under CPU, select 2 vCPU, and under Memory, select 8 GB.
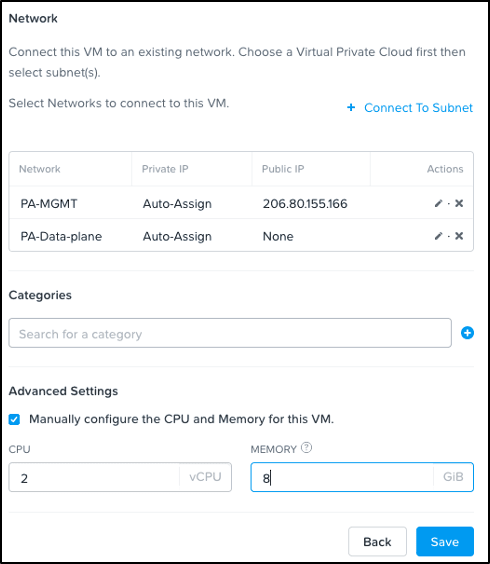
- Select Save.
- Once the VM is created, you can power on the Palo Alto Networks VM-Series virtual appliance.
Log in to the Palo Alto Networks VM-Series VM
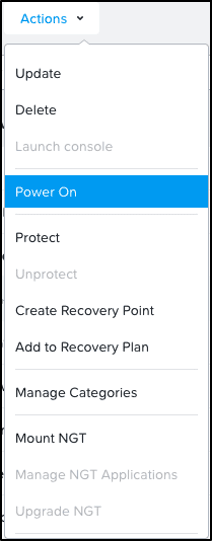
To log into the VM, open Prism, select the VM, then from the Actions menu, choose Launch Console.
NOTE: There is a possibility that the VM-Series could get stuck on the bootloader. In such a case, refer to the support article PA-VM deployed on Nutanix is stuck on bootloader.
Start the VM-Series firewall and configure the following settings on ethernet1/1:
- Select your VM, then select Actions > Power On.
- Make sure ethernet1/1 has a Maximum Transmission Unit (MTU) set to less than 1,500. Use SSH to connect to the public IP (associated floating IP) with administrator credentials and run the following command to set the MTU to 1,310:

> configure
> set network interface ethernet ethernet1/1 layer3 mtu 1310
- Run the following command from the Palo Alto Networks CLI to disable the Data Plane Development Kit (DPDK) on the VM if version of PAN VM-Series is less than 9.1:
> set system setting dpdk-pkt-io off

Commit to save the changes.
With this configuration, you can use the public floating IP to access the Xi web portal firewall. Now you can start setting up the VM-Series.
VPN Connection Between Palo Alto Networks VM-Series Virtual Appliance Running on Xi and an On-prem Palo Alto Networks Firewall
To configure the VPN connection between the Palo Alto virtual appliance running on Xi and an on-prem Palo Alto Networks firewall, refer to the support topic Palo Alto Networks VM-Series Firewalls on Xi
Use the internal IP of the VM-Series inside interface to set up the VPN connection instead of the floating IP.
© 2021 Nutanix, Inc. All rights reserved. Nutanix, the Nutanix logo and all Nutanix product, feature and service names mentioned herein are registered trademarks or trademarks of Nutanix, Inc. in the United States and other countries. Other brand names mentioned herein are for identification purposes only and may be the trademarks of their respective holder(s). This post may contain links to external websites that are not part of Nutanix.com. Nutanix does not control these sites and disclaims all responsibility for the content or accuracy of any external site. Our decision to link to an external site should not be considered an endorsement of any content on such a site. Certain information contained in this post may relate to or be based on studies, publications, surveys and other data obtained from third-party sources and our own internal estimates and research. While we believe these third-party studies, publications, surveys and other data are reliable as of the date of this post, they have not independently verified, and we make no representation as to the adequacy, fairness, accuracy, or completeness of any information obtained from third-party sources.
This post may contain express and implied forward-looking statements, which are not historical facts and are instead based on our current expectations, estimates and beliefs. The accuracy of such statements involves risks and uncertainties and depends upon future events, including those that may be beyond our control, and actual results may differ materially and adversely from those anticipated or implied by such statements. Any forward-looking statements included herein speak only as of the date hereof and, except as required by law, we assume no obligation to update or otherwise revise any of such forward-looking statements to reflect subsequent events or circumstances.