


This post was authored by Michael Haigh, Technical Marketing Engineer Nutanix
In our previous post, we deployed Jenkins onto a Nutanix Karbon Kubernetes cluster with Helm, configured a GitHub repository to store our application code, and configured a DockerHub repository to store our application containers. In this blog post, we’ll be configuring Jenkins, and creating our Jenkins Pipeline.
Jenkins Credential Creation
The first step of our Jenkins Setup is to add our various credentials to Jenkins’ credential store, which gives Jenkins the ability to authenticate to other pieces of our pipeline. We’ll first add our DockerHub credentials, which allows Jenkins to push images. Depending on your GitHub settings, you may also need to add GitHub credentials, so we’ll walk through that. And finally, we’ll add our Karbon kubeconfig file to allow Jenkins to deploy our application directly onto our Kubernetes cluster.
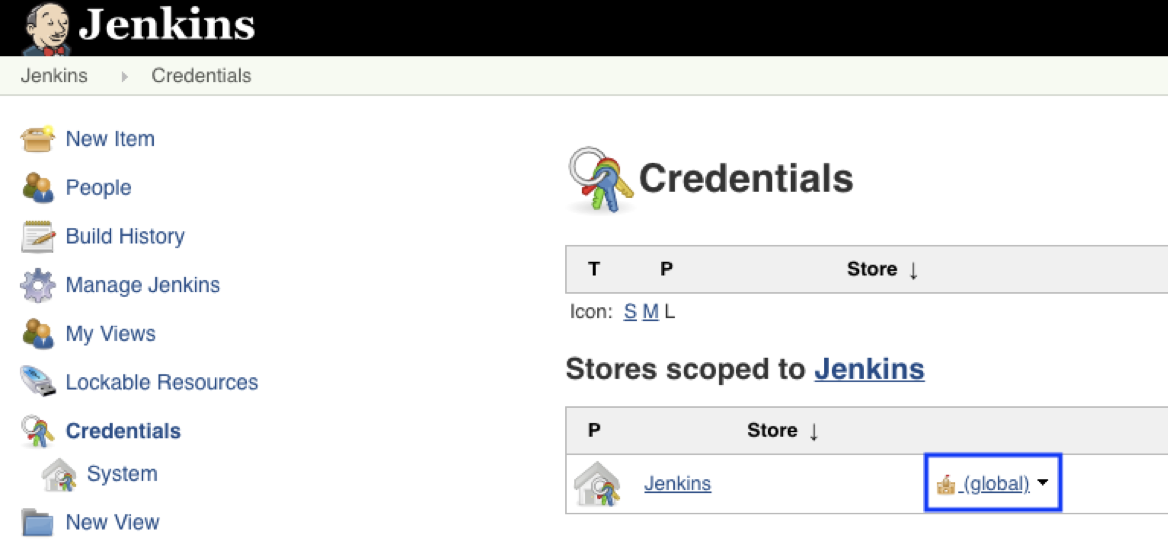
In the Jenkins UI, select Credentials along the left, and then the global domain:
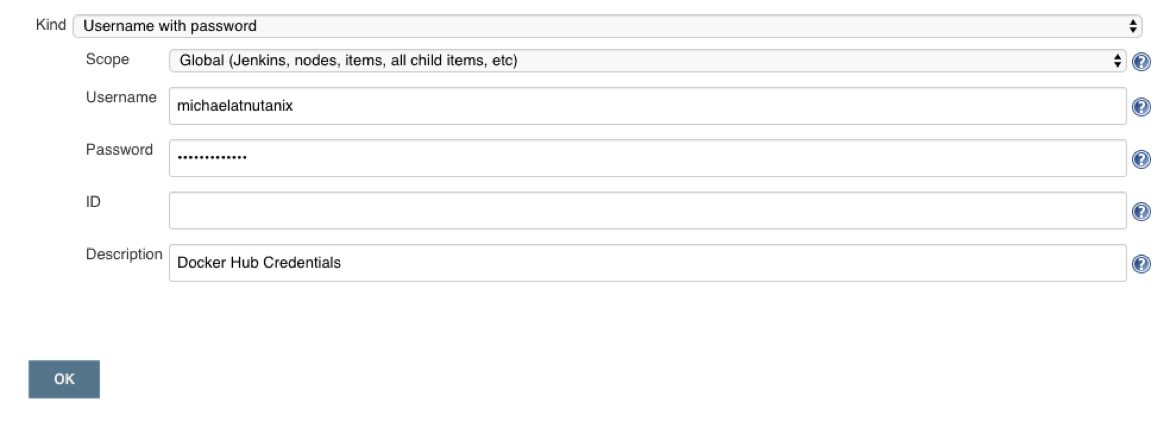
Next, click the Add Credentials along the left, leave the kind and scope dropdowns as default, fill in your DockerHub username and password, and select OK.
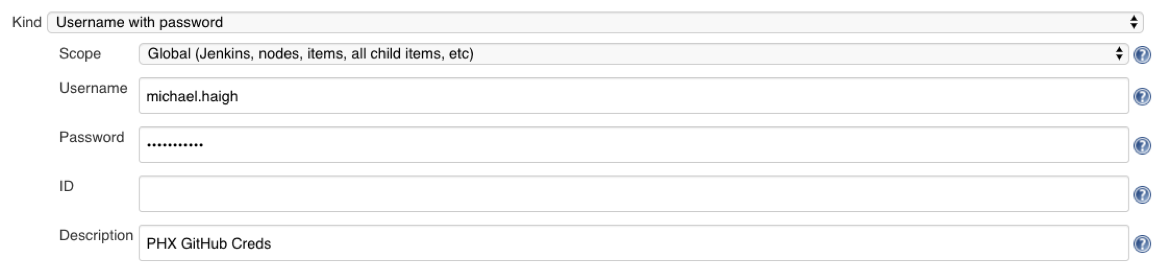
Depending on your GitHub configuration, you may also need credentials to view the repository that was created in Part 1. In my company, our GitHub is integrated with AD, so I’ll be adding my AD username and password. While this is adequate for a Proof of Concept, for a longer lived setup it is recommended to use an AD Service Account rather than a personal account.
Lastly, we’ll need to add our kubeconfig file as a credential to allow Jenkins to deploy our updated application onto our Kubernetes cluster. In our CLI, we’ll first create a Kubernetes Service Account jenkins, and then create a Role Binding which maps our Service Account the the built-in admin role.
$ kubectl create serviceaccount jenkins
$ cat << EOF > jenkins-rb.yaml
apiVersion: rbac.authorization.k8s.io/v1
kind: RoleBinding
metadata:
  namespace: default
  name: jenkins-rolebinding
roleRef:
  apiGroup: rbac.authorization.k8s.io
  kind: ClusterRole
  name: admin
subjects:
- kind: ServiceAccount
  name: jenkins
  namespace: default
EOF
$ kubectl create -f jenkins-rb.yaml
Note that we’re limiting our jenkins Service Account to a single namespace (default). The next step is to replace the token in our existing kubeconfig with the token of our newly generated Service Account, which we can do in one line with the following command. Be sure to substitute the bold part with the name of your kubeconfig.
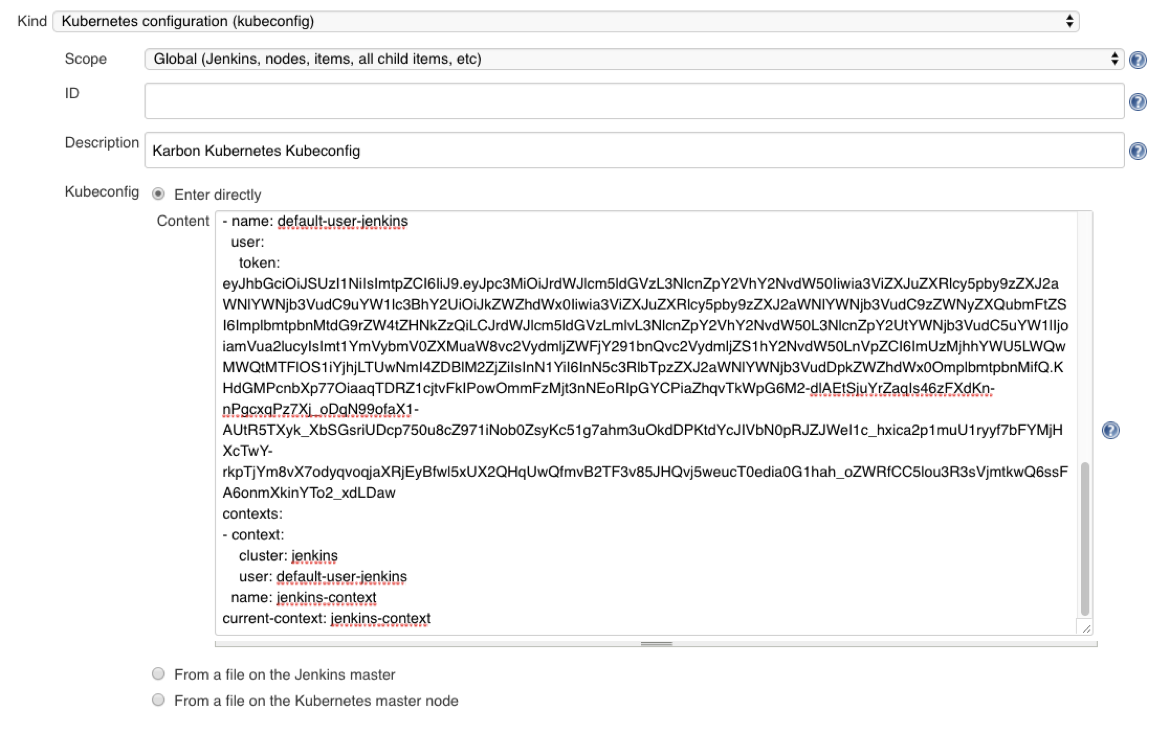
$ sed "s/ token:.*/ token: `kubectl get secrets $(kubectl get serviceaccounts jenkins -o jsonpath={.secrets[].name}) -o jsonpath={.data.token} | base64 --decode`/g" your-kubectl.cfgCopy the long result of the above command into your buffer, and head back into your Jenkins UI. Create another credential, but in the Kind dropdown, select Kubernetes Configuration (kubeconfig). Then select the Enter Directly radio button, and paste in the kubeconfig from your buffer.
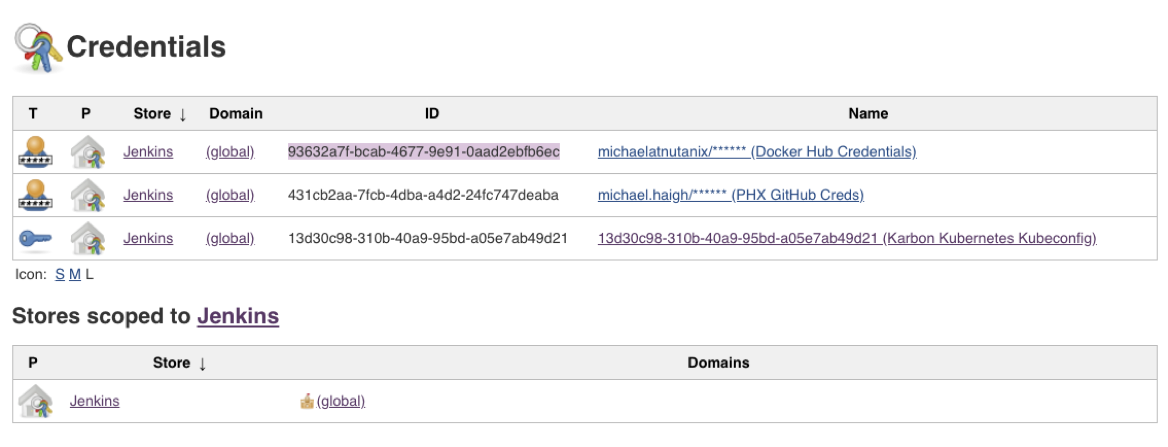
Once complete, navigate back to the main Credentials overview page. Take note of the IDs that were automatically generated when you created the credentials. All three credential IDs will be needed for Part 3 of this blog series when we create our Jenkinsfile.
Jenkins Pipeline Creation
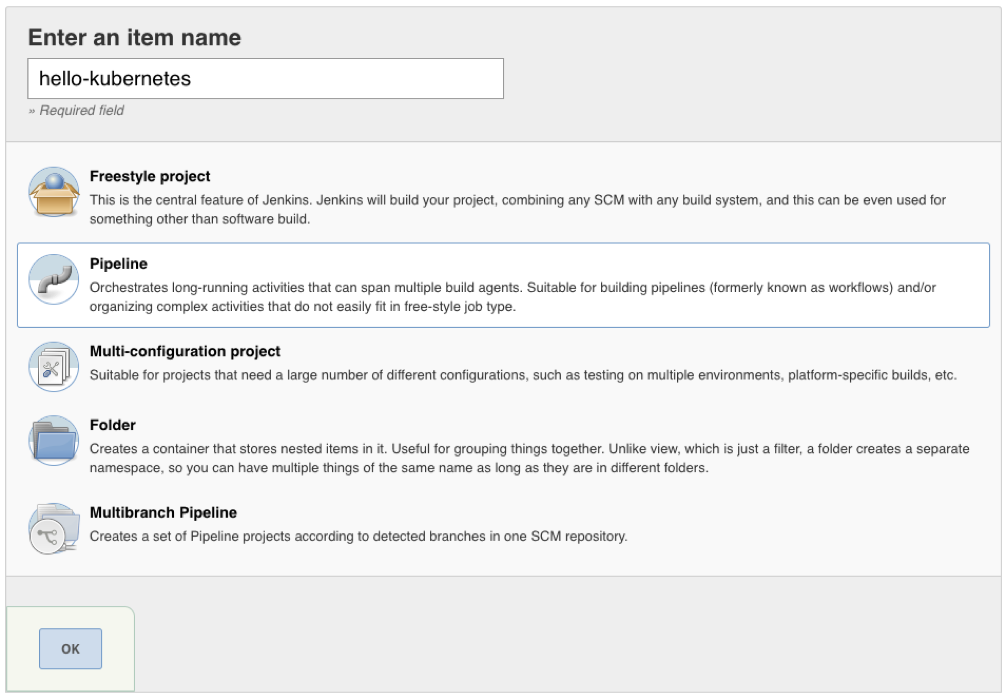
Next up, we’ll create our Jenkins Pipeline. Click New Item in the upper left, and on the page that appears, name your pipeline, select Pipeline, and click OK:
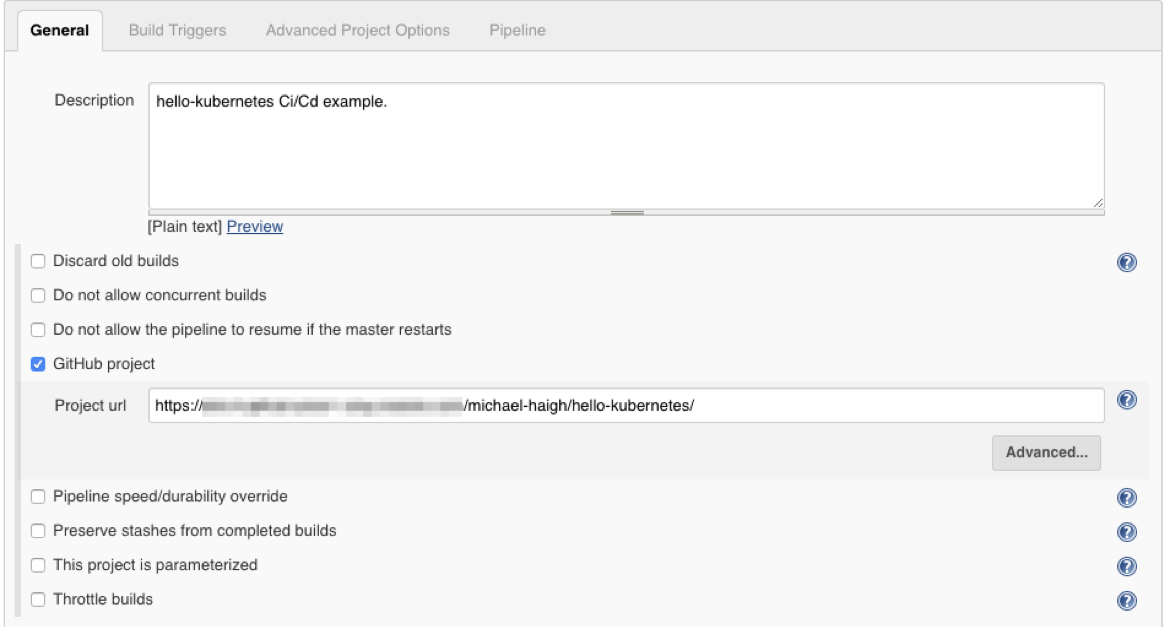
Under the General section, give your pipeline a description, and select the GitHub project checkbox. Paste in the URL of your GitHub repository that we created earlier.
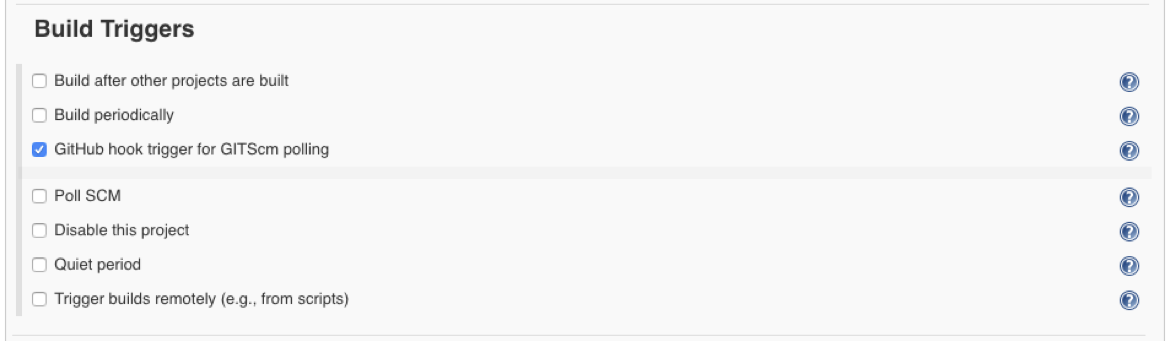
Under the Build Triggers section, select the GitHub hook trigger for GITScm polling checkbox:
Finally, under the Pipeline section, change the Definition dropdown to Pipeline Script from SCM. This allows us to store our Jenkinsfile in the same source code repository as our application. Change the SCM dropdown to Git, and in the new Repositories area that appears, paste in the same URL from the General step. If your GitHub requires credentials, you’ll receive a red error, at which point select the previously created GitHub Credentials.
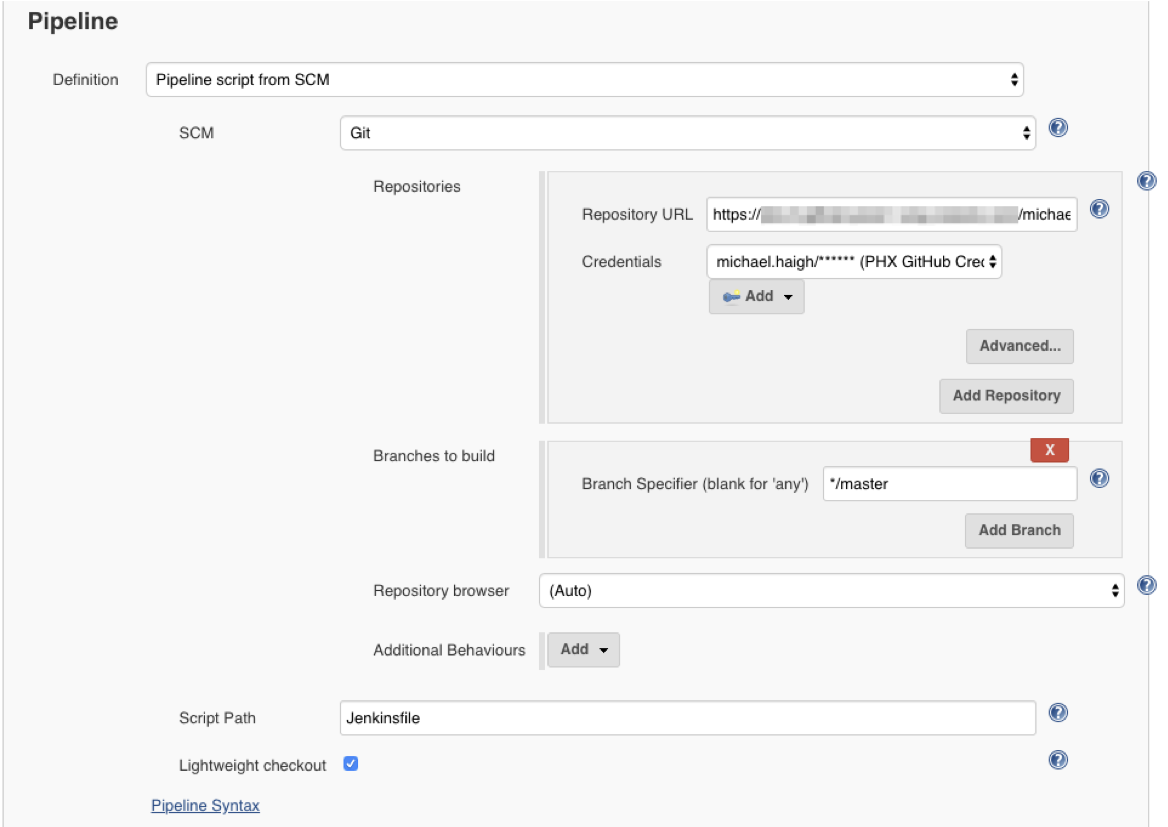
Scroll to the bottom of the page and click Save, where you’ll be taken to the pipeline homepage.
Jenkins Pipeline Snippet Generator
The last step in this blog post is to use the Jenkins Pipeline Syntax Snippet Generator to assist us when we go to create our Jenkinsfile in Part 3. Since the result of this section is a text string which will be included in our Jenkinsfile, it’s not required to perform the same steps on your system. However, it is good practice as it’s something you’ll likely need to do if you expand upon this example.
Within your pipeline homepage, click the Pipeline Syntax button in the left column. On the resulting page, change the Sample Step dropdown to kubernetesDeploy: Deploy to Kubernetes. In the Kubeconfig dropdown, select the Karbon Kubernetes Kubeconfig credential we created earlier, and type in hello-kubernetes-dep.yaml in the Config Files text box. Leave all other values as default.
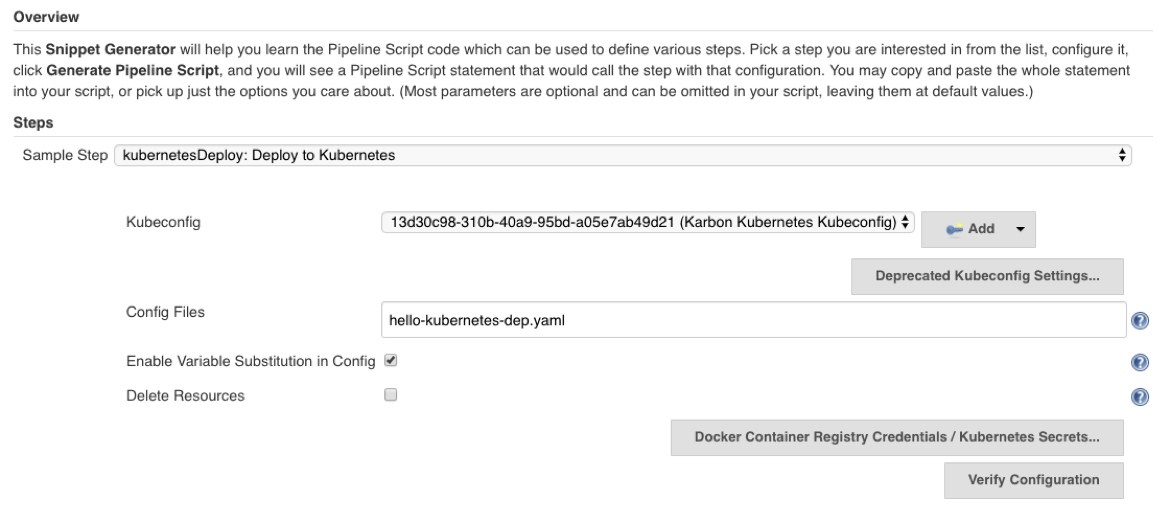
Once everything is filled out as shown in the above image, click the Generate Pipeline Script button. In the text box below, you should see a string like this:
kubernetesDeploy configs: 'hello-kubernetes-dep.yaml', kubeConfig: [path: ''], kubeconfigId: '13d30c98-310b-40a9-95bd-a05e7ab49d21', secretName: '', ssh: [sshCredentialsId: '*', sshServer: ''], textCredentials: [certificateAuthorityData: '', clientCertificateData: '', clientKeyData: '', serverUrl: 'https://']If you’re following along, your kubeconfigId will likely be different, but the other fields should all be the same. When this string is placed in a Jenkinsfile, it instructs Jenkins to deploy a certain configuration (hello-kubernetes-dep.yaml) against a particular Kubernetes cluster (in our case the cluster config is stored in the kubeconfig credential we created earlier in this post).
Summary
In this post we added three credentials to Jenkins, which allows for Jenkins to authenticate to other tools (GitHub, DockerHub, Kubernetes), created our Jenkins pipeline, and showed how to use the Snippet Generator tool to help build our Jenkinsfile. Stay tuned for the final post in this series, where we’ll create our Jenkinsfile, deploy our application, and update our application through a simple git push.
©️ 2019 Nutanix, Inc. All rights reserved. Nutanix, the Nutanix logo and the other Nutanix products and features mentioned herein are registered trademarks or trademarks of Nutanix, Inc. in the United States and other countries. All other brand names mentioned herein are for identification purposes only and may be the trademarks of their respective holder(s).