


This post was authored by Michael Haigh, Technical Marketing Engineer Nutanix
In our first post, we deployed Jenkins onto a Karbon Kubernetes cluster using a Helm chart, and configured GitHub and DockerHub to store application code and containers. In our second post, we added credentials to allow Jenkins to authenticate to the other tools, and created our Jenkins Pipeline. In this final post, we’ll be creating our Jenkinsfile, deploying our application, and finally updating our application through a single git push.
Jenkinsfile and Yaml Creation
Back in your workstation, use your favorite text editor to create a file called Jenkinsfile within the base hello-kubernetes/ directory. Copy the following contents into your file, but be sure to change the bolded items to your particular values (the IDs are from the credentials section of part 2):
node {
    docker.withRegistry('', '93632a7f-bcab-4677-9e91-0aad2ebfb6ec') {

        git url: "https://your-internal-github.com/your-name/hello-kubernetes/", credentialsId: '431cb2aa-7fcb-4dba-a4d2-24fc747deaba'
        env.GIT_COMMIT = sh(script: "git rev-parse HEAD", returnStdout: true).trim()

        stage "Build"
        def helloK8s = docker.build "michaelatnutanix/hello-kubernetes"

        stage "Publish"
        helloK8s.push 'latest'
        helloK8s.push "${env.GIT_COMMIT}"

        stage "Deploy"
        kubernetesDeploy configs: 'hello-kubernetes-dep.yaml', kubeConfig: [path: ''], kubeconfigId: '13d30c98-310b-40a9-95bd-a05e7ab49d21', secretName: '', ssh: [sshCredentialsId: '*', sshServer: ''], textCredentials: [certificateAuthorityData: '', clientCertificateData: '', clientKeyData: '', serverUrl: 'https://']

    }
}
Next, we’ll define our two Yaml files which will define our application. The first is a Service to expose the application outside of the Karbon Kubernetes cluster, and the second is a Deployment which defines the application containers. We’ll create both files within the hello-kubernetes/ directory, but we’ll only apply the service yaml, as Jenkins will apply the deployment yaml.
$ cat << EOF > hello-kubernetes-svc.yaml
apiVersion: v1
kind: Service
metadata:
  name: hello-kubernetes
spec:
  type: LoadBalancer
  ports:
  - port: 80
    targetPort: 8080
  selector:
    app: hello-kubernetes
EOF
$ cat << EOF > hello-kubernetes-dep.yaml
apiVersion: apps/v1
kind: Deployment
metadata:
  name: hello-kubernetes
spec:
  replicas: 3
  selector:
    matchLabels:
      app: hello-kubernetes
  template:
    metadata:
      labels:
        app: hello-kubernetes
    spec:
      containers:
      - name: hello-kubernetes
        image: michaelatnutanix/hello-kubernetes:${GIT_COMMIT}
        ports:
        - containerPort: 8080
EOF
$ kubectl apply -f hello-kubernetes-svc.yaml
Take note that we’re using a Service of type LoadBalancer, which is possible due to our installation of MetalLB in the prerequisite section of part 1. Also, notice the GIT_COMMIT environment variable in the Deployment yaml. Jenkins will automatically substitute in the git commit ID, so each time the deployment is applied, the image tag is incremented, and the pods are re-deployed.
Now that our Service is deployed, and our local files are written, it’s time to commit and push changes to our repository with the following commands.
$ git add Jenkinsfile hello-kubernetes-dep.yaml hello-kubernetes-svc.yaml
$ git commit -m 'Added Jenkinsfile and Application yaml'
$ git push
Typically, running git push will trigger a Jenkins build through the GitHub webhook, however this will not work until we manually trigger a build. This is because the SCM details (including the project URL) in the Jenkins pipeline are not initialized until the first build, and without those details Jenkins is not able to determine the correlation between the webhook and the pipeline. Let’s manually kick off a build to get things started.
Manual Jenkins Build and Application Deployment
Within the Jenkins UI, navigate to your pipeline, and click the Build Now link on the left column.
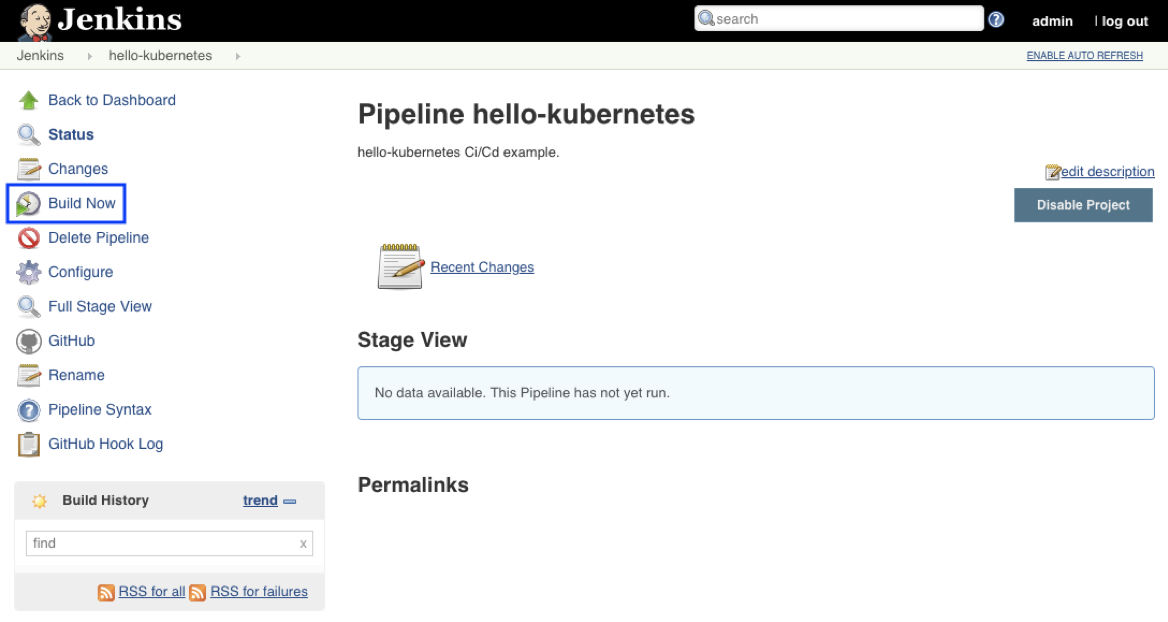
You should see build #1 in the Build History section. Open that build up, and then select the Console Output link on the left column. This will allow us to monitor the status of the Jenkins build. For instance, you’ll see that Jenkins successfully finds the Jenkinsfile from git, and then spins up a Jenkins Agent to perform the build steps:

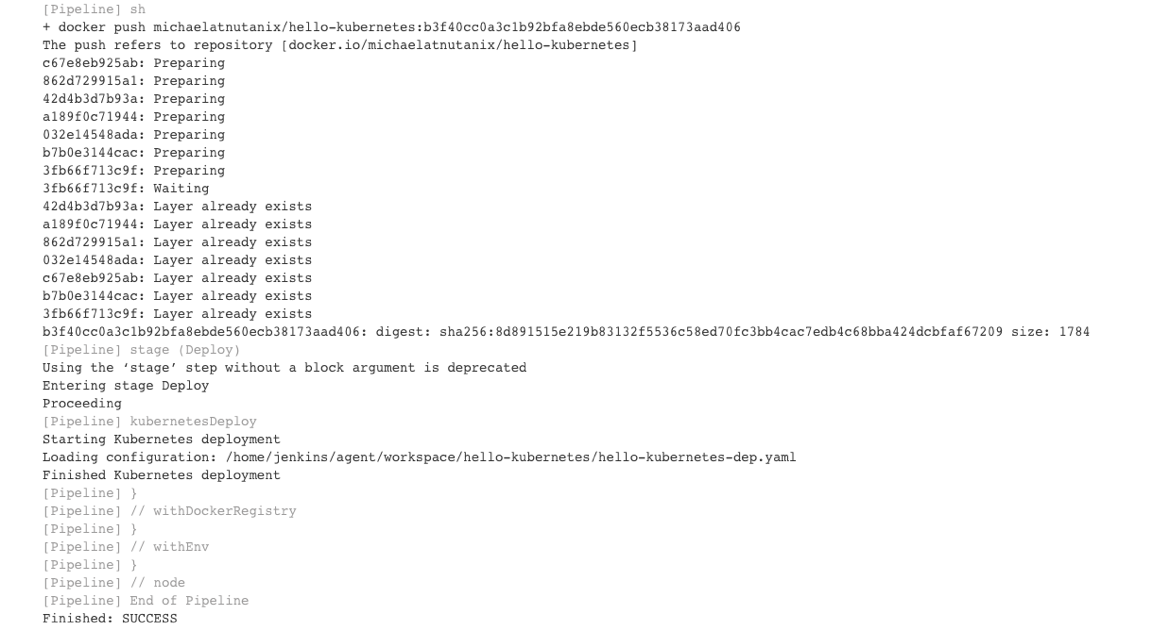
If everything until this point has been done successfully, after a couple of minutes you should see the container being built, the image pushed to DockerHub, and finally the Deployment yaml getting applied to our Kubernetes cluster.
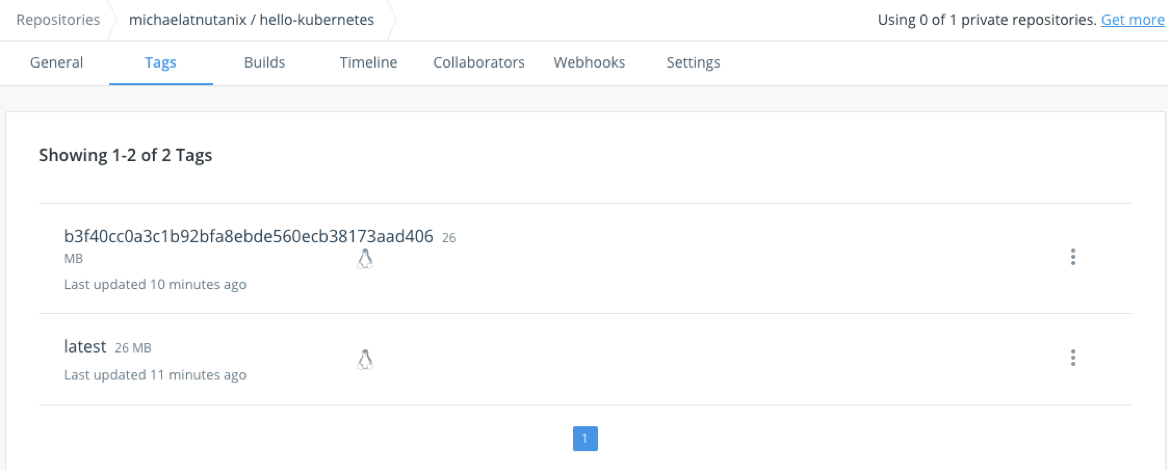
We can validate in DockerHub that we’ve successfully pushed our new image, both with the latest tag and the git commit ID.
We can also validate through the command line that our pods have been deployed, and our application service has an IP.
$ kubectl get pods
NAME                                READY   STATUS    RESTARTS   AGE
hello-kubernetes-6d6bb6f8cd-8p62r   1/1     Running   0          85s
hello-kubernetes-6d6bb6f8cd-dww5c   1/1     Running   0          85s
hello-kubernetes-6d6bb6f8cd-g742q   1/1     Running   0          85s
[michael@haigh hello-kubernetes]$ kubectl get svc
NAME              TYPE          CLUSTER-IP      EXTERNAL-IP   PORT(S)        AGE
hello-kubernetes  LoadBalancer  172.19.167.186  10.45.100.12  80:30360/TCP   12m
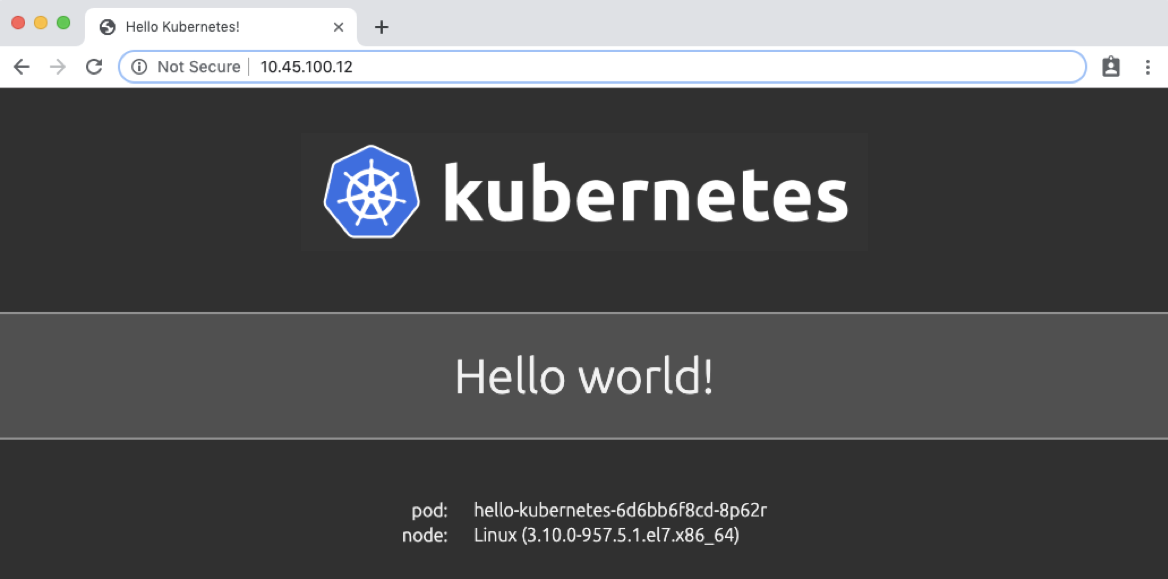
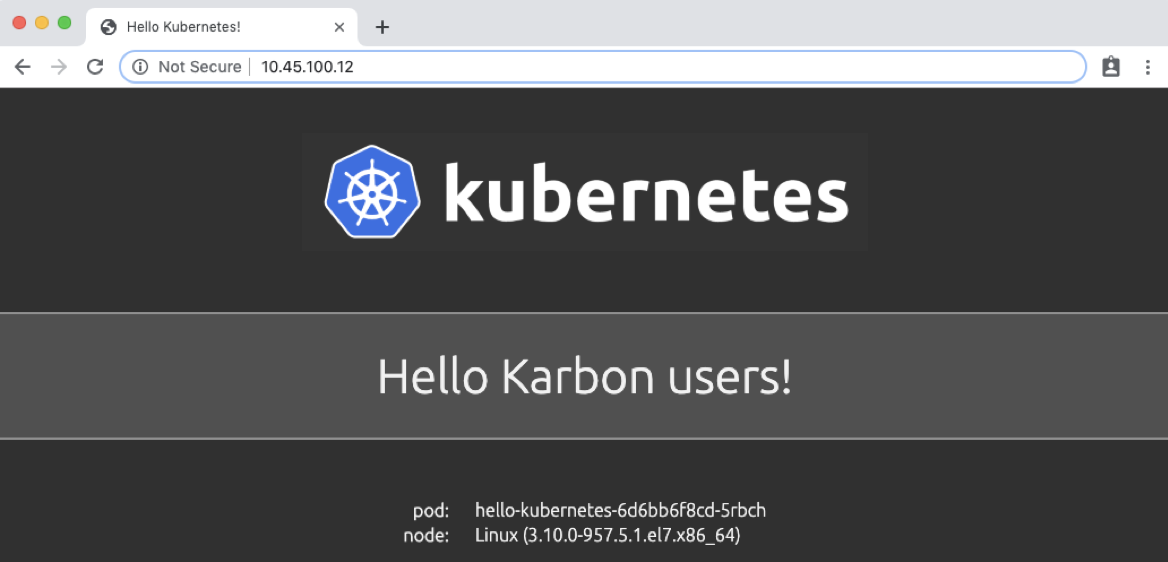
We can then access our application via the External-IP value of the hello-kubernetes service (10.45.100.12 in my case). Be sure to refresh the page several times to see the pod change.
Automated Application Deployment Through a Git Push
If you’ve made it this far, congratulations! We’re finally at a point where we can kick off fully automated builds and deployments. To do so, we need to commit and push a change in our application code. So our change is obvious, we’ll change the Hello world! message to Hello Karbon users! From within the hello-kubernetes/ directory on your workstation, run the following commands to change the code, add the change, commit the change, and finally push the change:
$ sed -i 's/world/Karbon users/g' server.js
$ git add server.js
$ git commit -m "Modified Hello message."
$ git push
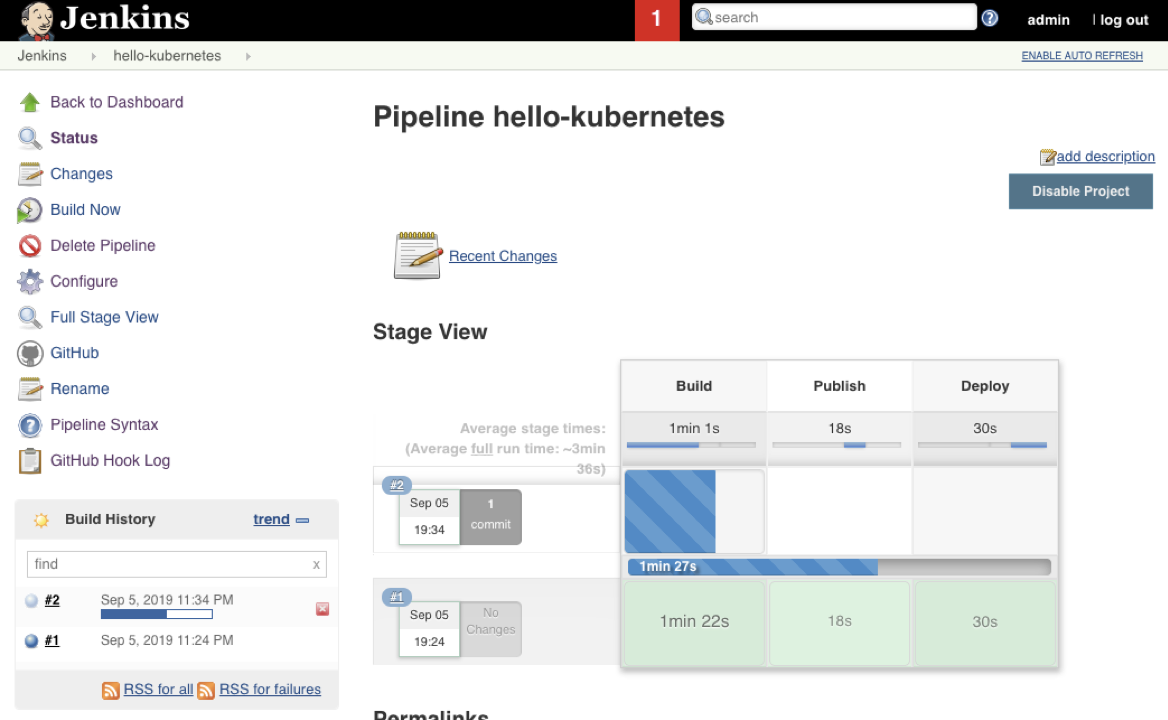
As soon as you run git push, you should see an automated build started in your Jenkins project:
Once the build is complete, let’s first verify we have new pods deployed via the command line.
$ kubectl get pods
NAME                               READY   STATUS    RESTARTS   AGE
hello-kubernetes-65bd8bbbb-6d2rk   1/1     Running   0          45s
hello-kubernetes-65bd8bbbb-5rbch   1/1     Running   0          37s
hello-kubernetes-65bd8bbbb-lxwt7   1/1     Running   0          41s
Finally, refresh our application page to view the updated message:
Conclusion
While setting up a CI/CD pipeline can be quite a bit of effort, the value it brings to your organization makes it well worth it. Once configured, a simple git push -- an operation your developers likely run several times a day -- results in a brand new application, with minimal to no effort on your or the developers part. This can be further expanded into advanced techniques like Canary releases or A/B testing. Thanks for reading!
©️ 2019 Nutanix, Inc. All rights reserved. Nutanix, the Nutanix logo and the other Nutanix products and features mentioned herein are registered trademarks or trademarks of Nutanix, Inc. in the United States and other countries. All other brand names mentioned herein are for identification purposes only and may be the trademarks of their respective holder(s).