


Disclaimer: This post is intended for demo purposes and must not be considered production ready. Velero is not included in Nutanix Karbon, hence Nutanix support won’t handle any case related to Velero.
Overview
One of the main principles of containerised applications is stateless. The reason is not make this application portable and non dependant of any data. In this way you can re-use the same container image on any platform with the same result.
Because containers started to gain popularity because the portability, scalability, and so on, the community found out a way to containerise stateful applications like databases with the use of local storage, or shared volumes.
Recover stateless applications is a very straightforward process, you just need to re-apply your manifest file in another cluster. You just need to make sure your manifest file is up-to-date with the latest state running in your cluster. Remember you shouldn’t make changes directly in your cluster, you should update your manifest file with the new changes and apply this into your cluster.
What about stateful applications? Well, because with containers the data is decoupled from the application, the backup process can be a bit challenging. There are native commands to copy the file system of your persistent volume to another location, or use the native capabilities of your underlying storage to replicate the data to a DR site. But this process requires additional task when you want to restore the data in the DR site, and also depending on what Kubernetes storage plug-in you are using, you may need to export even secret keys to be able to mount the storage in the DR site.
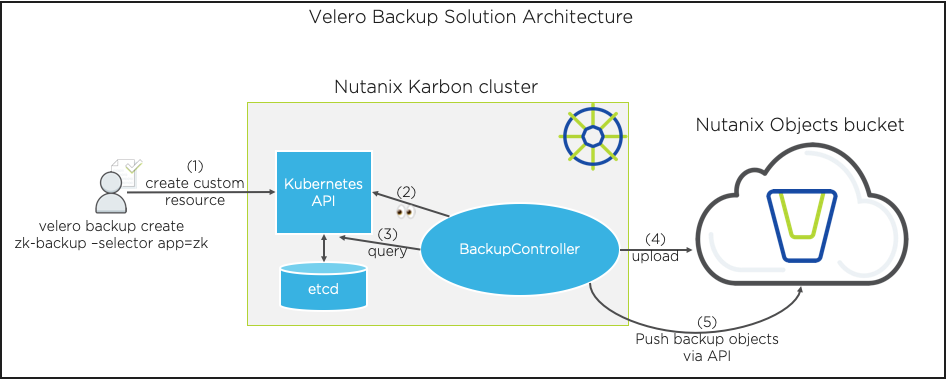
To streamline the backup and restore process for stateless and stateful applications, Heptio developed Ark, now called Velero. In this blog we will use Velero to backup a ZooKeeper application running in a Nutanix Karbon cluster with Kubernetes. The backup will be pushed to a Nutanix Objects bucket.
What is Velero?
[source: Velero GitHub repo]
Velero (formerly Heptio Ark) gives you tools to back up and restore your Kubernetes cluster resources and persistent volumes. You can run Velero with a cloud provider or on-premises. Velero lets you:
-
Take backups of your cluster and restore in case of loss.
-
Migrate cluster resources to other clusters.
-
Replicate your production cluster to development and testing clusters.
Velero consists of:
-
A server that runs on your cluster
-
A command-line client that runs locally
Velero has support for backing up and restoring Kubernetes volumes using a free open-source backup tool called restic. This support is considered beta quality. Please see the list of limitations to understand if it currently fits your use case.
What is restic?
[source: restic GitHub repo]
restic is a backup program that is fast, efficient and secure. It supports the three major operating systems (Linux, macOS, Windows) and a few smaller ones (FreeBSD, OpenBSD).
What is Nutanix Objects?
Nutanix Objects is a software-defined object storage solution that non-disruptively scales-out while lowering overall costs. It’s designed with an S3-compatible REST API interface to handle terabytes to petabytes of unstructured data, all from a single namespace. Objects is designed for backup, long term retention/archiving, and cross-region devops teams. It’s deployed and managed as part of the Nutanix Enterprise Cloud Platform, eliminating the need for additional storage silos.
With Objects, Nutanix customers can enable object storage services on existing clusters or set up new clusters with storage dense nodes.
Setup
Prerequisites
-
A working Nutanix Objects instance. If you don’t have one, what are you waiting for? With AOS 5.11 and above, 2TiB of Nutanix Objects is included for free on a per-cluster basis.
-
Two working Karbon Kubernetes clusters with at least three workers each. If you haven’t done it before, have a look at this blog from my colleague Michael Haigh.
-
Primary Kubernetes cluster called K8s-Prod.
-
DR Kubernetes cluster called K8s-DR.
-
Create a Bucket
Let’s create a bucket in Nutanix Objects where Velero will store the backups.
-
In Prism Central, click Menu → Services → Objects.
-
Let’s create first the access keys for Velero. Click Access Keys → Add People.
-
Choose Add people not in a directory service.
-
You can use any email addresses, I’ll use velero@karbon.local.
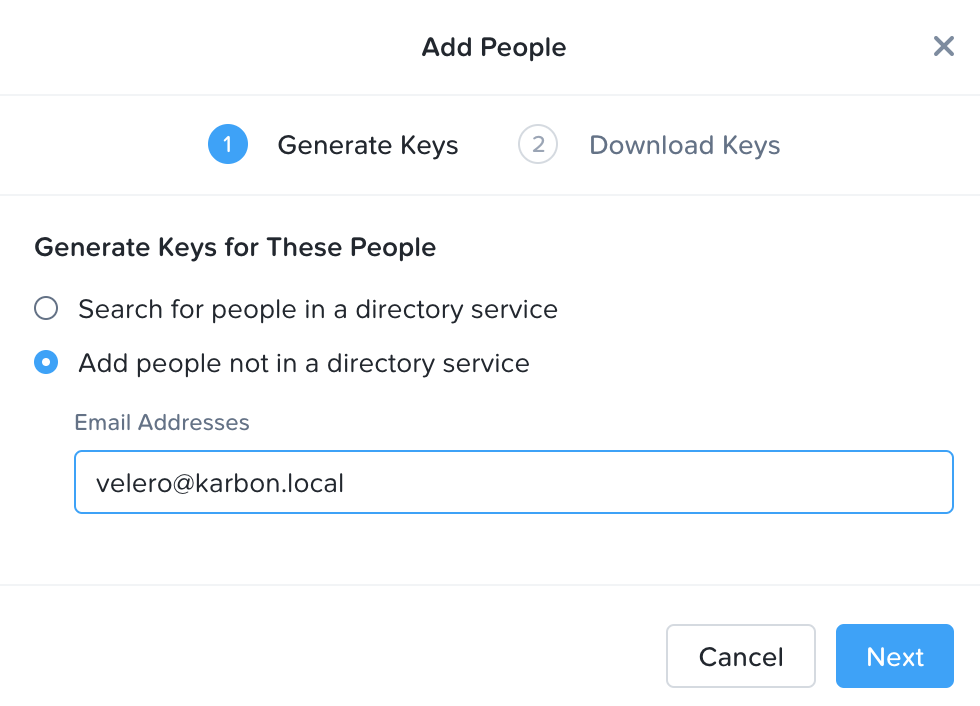
5.Click Next and Download Keys.
6.Click Close.
7.Click Object Stores and later your Objects instance. My Object instance name is Theale.

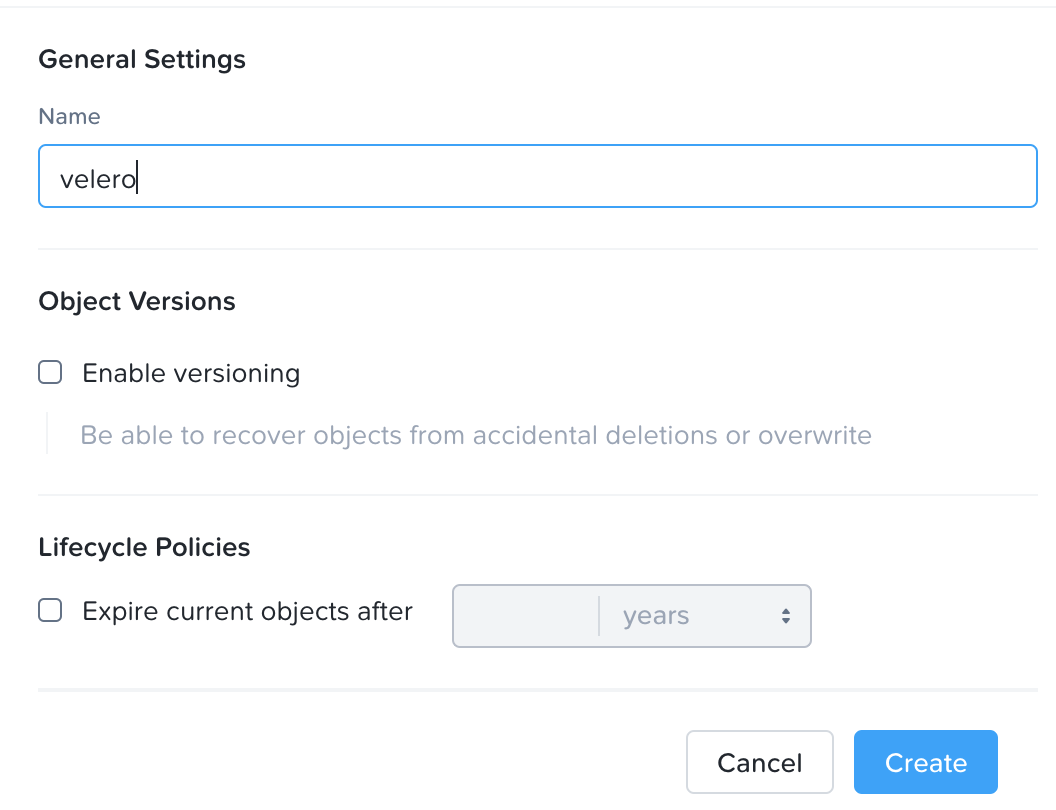
8.Click Create Bucket.
9.Give a name, for example velero, and click Create.
10.Select the velero bucket, and click Share.
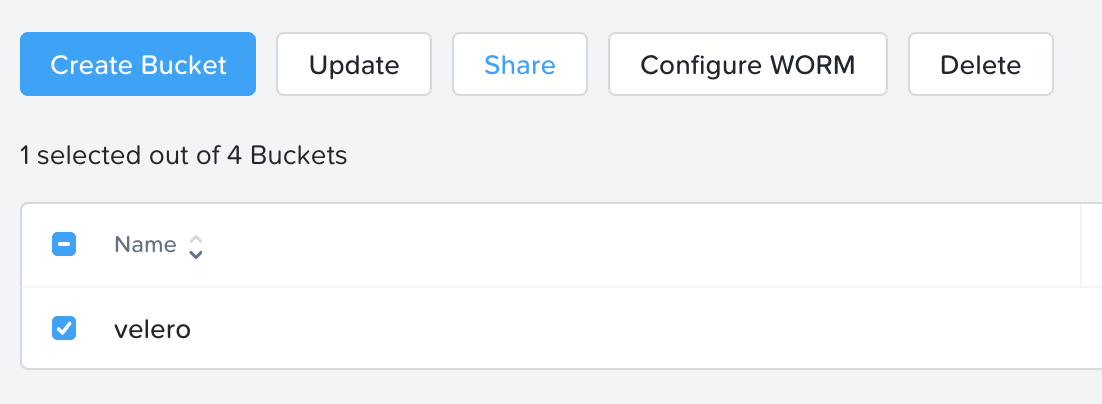
11.Search for the user you created before, and add Read/Write permissions.
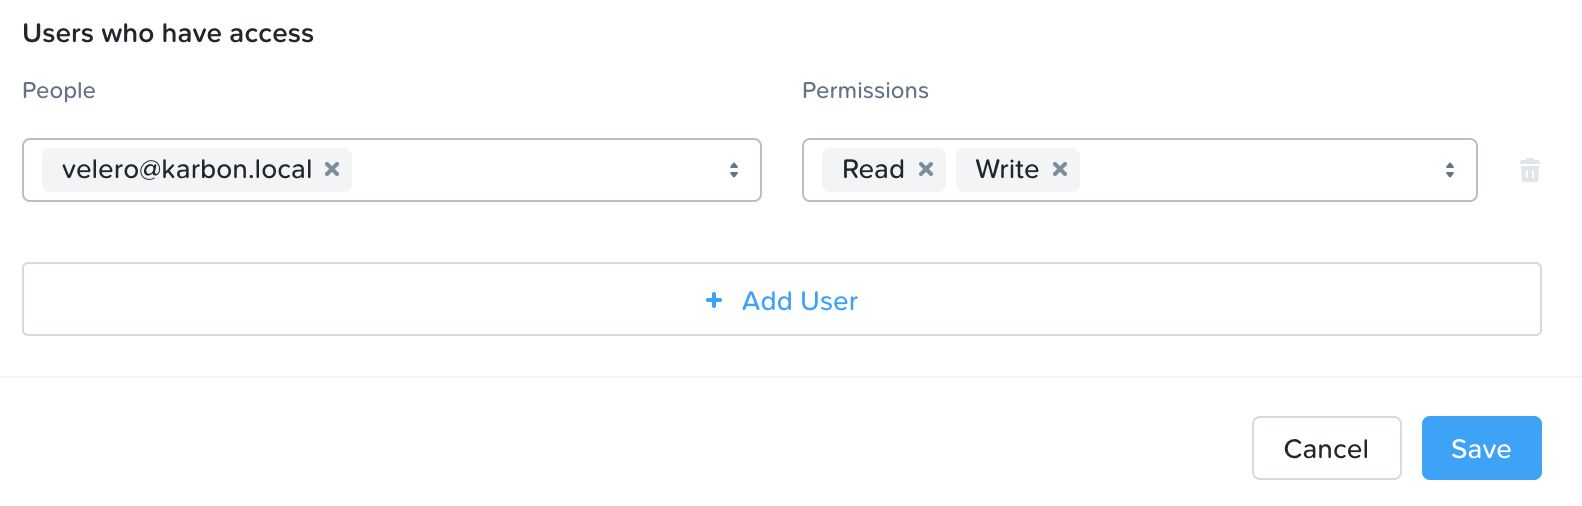
12.Click Save.
Your bucket is ready to be used by Velero!
Download Velero
Download the latest version of Velero for your operating system from here. At the time of writing this blog Velero v1.1.0 is the latest release. I’ll be working with the Darwin platform since my laptop is a MacBook.
Install Velero
1.Extract the tarball:
tar -xvf <RELEASE-TARBALL-NAME>.tar.gz2.Move to the folder where you have extracted the tarball:
cd velero-<RELEASE-TARBALL-NAME>3.Create a Velero-specific credentials file (credentials-velero) in your local directory. You can retrieve the keys from the downloaded text file:
vi credentials-velero[default]
aws_access_key_id = <OBJECTS-ACCESS-KEY>
aws_secret_access_key = <OBJECTS-SECRET-KEY>Before you run the install command, make sure you have a working KUBECONFIG for the cluster you want to install Velero (K8s-Prod first). You can use kubectl to verify this.
4.Install Velero for the AWS cloud provider. Nutanix Objects is S3 API compatible, Velero will be able to store the backups on it using S3 API calls. Use the following command (remember to replace the command with your Nutanix Objects IP address instance):
./velero install \
--provider aws \
--bucket velero \
--secret-file ./credentials-velero \
--use-volume-snapshots=false \
--backup-location-config region=us-east-1,s3ForcePathStyle="true",s3Url=http://<OBJECTS-INSTACE-IP-ADDRESS> \
--use-restic
5.(Optional) Check the logs to make sure there are no errors:
kubectl logs deployment/velero -n veleroNow you have a working Velero deployment.
6.Before we can deploy an application, we need to update Restic DaemonSet because the kubelet hostPath for Kubernetes clusters deployed by Karbon is different (/var/nutanix/var/lib/kubelet) to the Restic standard hostPath (/var/lib/kubelet).
kubectl -n velero patch daemonset restic -p='{"spec":{"template":{"spec":{"volumes":[{"hostPath":{"path":"/var/nutanix/var/lib/kubelet/pods","type":""},"name":"host-pods"}]}}}}'7.Repeat steps 4 to 6 in your Kubernetes DR cluster.
It’s time to deploy an application and test a backup.
Deploy Application
The example is a ZooKeeper application using StatefulSets, PodDisruptionBudgets, and PodAntiAffinity. The persistent volumes for the StatefulSets keeps the ZooKeeper distributed data. For this example you need a Karbon Kubernetes cluster with three workers.
1.Deploy the ZooKeeper app:
kubectl apply -f https://raw.githubusercontent.com/kubernetes/website/master/content/en/examples/application/zookeeper/zookeeper.yaml2.The following command explains how to add annotations to the pods you want to backup.
kubectl annotate pod/YOUR_POD_NAME backup.velero.io/backup-volumes=YOUR_VOLUME_NAME_1,YOUR_VOLUME_NAME_2,...For our example, because the application is a Kubernetes StatefulSet, the pod names are consistent and don’t change (zk-0, zk-1 and zk-2). The same for the volume, the name is datadir for the three pods.
The command to update the three pods with the annotations is:
for i in 0 1 2; do kubectl annotate pod/zk-$i backup.velero.io/backup-volumes=datadir; done3.Before creating a backup, let’s create some data in our ZooKeeper application.
kubectl exec zk-0 zkCli.sh create /karbon rocksBackup Application
1.Create a Velero backup:
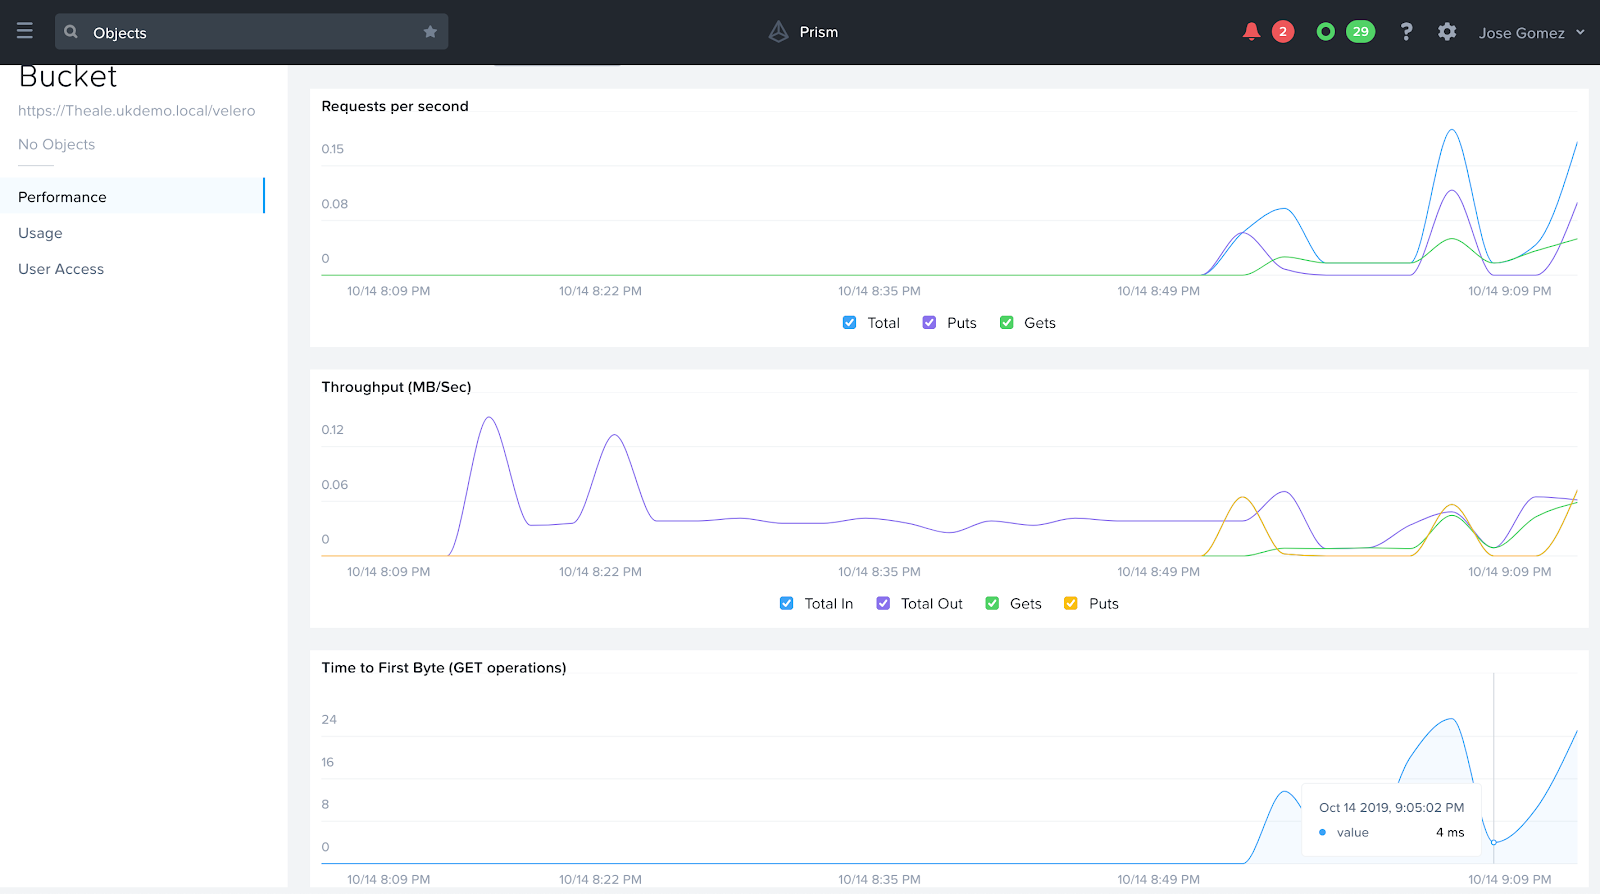
./velero backup create zk --selector app=zk2.Check your Velero backup status:
./velero backup describe zkIf you check the bucket in Nutanix Objects, you will see there has been traffic coming in and out.
Restore Application
Let’s restore the backup in the K8s-DR cluster. Make sure you have installed Velero in your DR cluster too. It’s important you have the right KUBECONFIG set.
1.Get the existing Velero backups:
./velero backup getNAME STATUS CREATED EXPIRES STORAGE LOCATION SELECTOR
zk Completed 2019-10-19 15:18:47 +0100 BST 29d default app=zk
2.List the Kubernetes pods in the default namespace to make sure you don’t have ZooKeeper running. If you have one, make sure you are on the DR Kubernetes cluster.
kubectl get podsNo resources found.3.Restore the backup:
./velero restore create --from-backup zk4.Check the restore has been successful watching the pods, services and PVCs in the default namespace:
kubectl get pods -wNAME READY STATUS RESTARTS AGE
zk-0 1/1 Running 0 1m36s
zk-1 1/1 Running 0 1m36s
zk-2 1/1 Running 0 1m36s
kubectl get allNAME READY STATUS RESTARTS AGE
pod/zk-0 1/1 Running 0 6m47s
pod/zk-1 1/1 Running 0 6m47s
pod/zk-2 1/1 Running 0 6m47s
NAME TYPE CLUSTER-IP EXTERNAL-IP PORT(S) AGE
service/kubernetes ClusterIP 172.19.0.1 <none> 443/TCP 107m
service/zk-cs ClusterIP 172.19.156.32 <none> 2181/TCP 6m47s
service/zk-hs ClusterIP None <none> 2888/TCP,3888/TCP 6m47s
kubectl get pvcNAME STATUS VOLUME CAPACITY ACCESS MODES STORAGECLASS AGE
datadir-zk-0 Bound pvc-5350c69e-167f-4a94-839e-98e1fbc1ee38 10Gi RWO default-storageclass 7m26s
datadir-zk-1 Bound pvc-9aeeb4a5-7e8e-411f-afe8-b8e4e5bd3eeb 10Gi RWO default-storageclass 7m26s
datadir-zk-2 Bound pvc-38717562-2b8b-404a-9bbe-f65c65ff8a29 10Gi RWO default-storageclass 7m26s5.Check if the data we created in our production Kubernetes cluster (karbon rocks) is available in the DR cluster:
kubectl exec zk-1 zkCli.sh get /karbonConnecting to localhost:2181
2019-10-19 15:09:42,389 [myid:] - INFO [main:Environment@100] - Client environment:zookeeper.version=3.4.10-39d3a4f269333c922ed3db283be479f9deacaa0f, built on [...]
.
.
.
[...]
2019-10-19 15:09:42,503 [myid:] - INFO [main-SendThread(localhost:2181):ClientCnxn$SendThread@1299] - Session establishment complete on server localhost/0:0:0:0:0:0:0:1:2181, sessionid = 0x26de4881a0e0000, negotiated timeout = 30000
WATCHER::
WatchedEvent state:SyncConnected type:None path:null
rocks
cZxid = 0x10000000e
ctime = Sat Oct 19 14:56:50 UTC 2019
mZxid = 0x10000000e
mtime = Sat Oct 19 14:56:50 UTC 2019
pZxid = 0x10000000e
cversion = 0
dataVersion = 0
aclVersion = 0
ephemeralOwner = 0x0
dataLength = 5
numChildren = 0Conclusion
Backups should be pushed as much as possible to use the application built-in capabilities for this than to infrastructure proprietary mechanisms. This will ensure you keep agnostic and the same process will work regardless of where you run your application.
But if you don’t have another choice and still want to take a backup of your entire Kubernetes cluster, namespace or any specific Kubernetes objects, Velero is a very good way to achieve this. Nutanix Objects complements Velero with a S3 API compatible bucket to store and restore backups.